


Learning how to install a reverse osmosis system under a sink starts with checking whether the cabinet, plumbing, faucet area, and drain can support the system. In a compatible kitchen, a typical installation involves connecting a feed-water adapter to the cold-water line, mounting a dedicated RO faucet, installing a drain saddle above the P-trap, positioning the filtration unit and storage tank if included, connecting the tubing, and flushing the system.
Many homeowners can complete a DIY under-sink RO installation with basic plumbing tools. However, installing the components is only part of the job. You also need enough room to service the filters, a reliable cold-water shutoff valve, an appropriate drain connection, and—on powered systems—a nearby electrical outlet.
Always use the installation manual supplied with your RO system. Port labels, tubing colors, adapter sizes, faucet hardware, filter loading, and startup procedures vary by model.
Can You Install a Reverse Osmosis System Under Your Sink?
Before buying tools or disconnecting plumbing, inspect the entire installation area. A system that technically fits inside the cabinet may still be impractical if you cannot reach its filters, tighten the faucet nut, route tubing without kinks, or remove cartridges later.
A typical under-sink reverse osmosis installation needs access to:
- The cold-water shutoff valve and faucet supply line
- A suitable location for the feed-water adapter
- A sink or countertop opening for the RO faucet
- An accessible drain pipe section above the P-trap
- Cabinet space for the RO unit and, when applicable, a storage tank
- Clear tubing routes between the feed, unit, drain, tank, and faucet
- A grounded power outlet if the system uses an electric pump or controls
- Enough open space to replace filters and inspect connections
Do not assume that every under-sink cabinet is installation-ready. Garbage disposals, dishwasher hoses, pull-out organizers, deep sink basins, and unusual drain configurations can all affect fit.
Under-sink RO installation fit table: easy fit, workable with changes, or call a professional
|
Installation factor |
Easy DIY fit |
Workable with changes |
Call a professional or reconsider
|
|---|---|---|---|
|
Cold-water valve |
Closes fully and is easy to access |
Compatible after using a manufacturer-approved adapter |
Stuck, leaking, heavily corroded, or non-standard |
|
Faucet opening |
Unused accessory hole fits the RO faucet |
New hole can be safely drilled in an appropriate material |
Fragile surface, uncertain drilling method, or drilling prohibited |
|
Drain connection |
Accessible pipe section above the P-trap and away from other discharge connections |
Plumbing can be safely rearranged |
No appropriate saddle location or code-sensitive layout |
|
Cabinet space |
Unit, tubing, and tank fit with maintenance clearance |
Storage or organizers must be relocated |
Filters cannot be removed without dismantling plumbing |
|
Garbage disposal |
Leaves a clear drain and tubing route |
Unit or tank must be repositioned |
Disposal blocks the only suitable drain or service area |
|
Electrical access |
Required outlet is already available |
An electrician can add an appropriate outlet |
No power for a system that requires it |
|
Tubing route |
Gentle bends with service slack |
Minor layout changes are needed |
Tubing would be pinched, stretched, or sharply bent |
What to measure and inspect before starting an under sink reverse osmosis installation
Measure the usable cabinet space rather than the cabinet’s outside dimensions. Sink bowls, disposal motors, drain pipes, hinges, and pull-out hardware reduce the actual installation area.

Record the following:
- Usable cabinet width, depth, and height. Compare these measurements with the dimensions in the system manual.
- Clearance below the filter unit. Cartridge housings or filters may need to move downward or outward during replacement.
- Storage tank space. A tank-based RO system needs room for both the tank body and its shutoff valve and tubing.
- Faucet shank access. Verify that you can reach beneath the proposed faucet location to install washers and the mounting nut.
- Tubing paths. Plan routes that avoid hot pipes, cabinet slides, sharp edges, and disposal vibration.
- Drain pipe access. Identify an appropriate pipe section above the P-trap and away from disposal or dishwasher discharge points.
- Feed connection. Inspect the cold-water valve, supply-line fitting, thread condition, and available working room.
- Power availability. Confirm the requirement in the manual. Many tankless or pumped units need a nearby grounded outlet, while many traditional tank-based designs do not.
Also verify the inlet-water requirements listed for the specific system. Water pressure and other operating conditions are model-dependent. If the home’s pressure is outside the specified range, the unit may have poor flow or require additional plumbing equipment.
Will this work under a small sink (tight cabinets, garbage disposal, pull-out trash)?
A reverse osmosis system can work under a small sink, but the layout must be planned around both installation and maintenance.
Start by removing everything from the cabinet. Extend pull-out trash cans and organizers through their full travel while measuring. A system that fits when a drawer is closed may be struck each time the drawer opens. Check whether the garbage disposal blocks the faucet shank, drain saddle location, or filter-removal path.
In a tight cabinet, consider these layout strategies:
- Mount a compatible manifold on a side wall rather than the back wall.
- Place a storage tank in an adjacent cabinet only if the product manual permits the proposed tubing arrangement.
- Keep tubing away from disposal vibration and sharp mounting hardware.
- Use gentle tubing loops instead of forcing short, tight bends.
- Preserve access to the cold-water valve so it can be shut off quickly.
- Make sure the drain saddle remains visible enough to inspect for leaks.
- Do not bury the system behind permanent shelving or tightly packed storage.
Tankless systems can remove the need for a separate storage tank, but they are not automatically suitable for every small cabinet. The main unit still needs a stable position, service clearance, tubing space, and often electrical power. Compare the complete installed layout—not just the system body—with the space available.
Only choose under-sink RO if you can access filters/membrane without disconnecting tight tubing
Maintenance clearance is an installation requirement, not a convenience. Filters, membranes, and other service components eventually need attention according to the product manual. If replacing them requires disconnecting pressurized tubing or removing the entire drain assembly, the original layout is too tight.
Before mounting anything, simulate the service process:
- Identify how each filter or cartridge is removed.
- Check whether the filter moves down, forward, or sideways.
- Leave enough tubing slack to pull out a serviceable unit where the design permits.
- Keep shutoff valves and locking clips accessible.
- Avoid stretching tubing between ports.
- Leave enough room to hold a towel or small container beneath the system during maintenance.
- Position external components in the order shown in the model’s plumbing diagram.
Slack does not mean leaving tangled coils throughout the cabinet. Use clean, gentle routes that allow movement without creating low loops that can be crushed by stored items.
Tank-based versus tankless RO: how the system design changes cabinet space, tubing, storage, and power requirements
A tank-based system generally has a filtration manifold plus a pressurized storage tank. The installation usually includes a dedicated tank tube and tank valve. You must find space for the tank and keep its valve accessible. Many conventional tank systems operate without electricity, although this must be confirmed for the individual model.
A tankless system eliminates the separate storage tank, which can simplify one part of the layout. However, the main unit may contain a pump and electronic controls. Many powered tankless systems need a grounded outlet beneath or near the sink. Some configurations also include model-specific external components that must be installed in the correct tubing sequence.
Neither design is universally easier to install. Choose based on:
- Actual cabinet dimensions
- Available electrical power
- Filter service access
- Tubing and drain routes
- The manufacturer’s operating requirements
- Whether you prefer a separate tank or an integrated unit
Once you confirm these factors, you can compare under-sink reverse osmosis systems by configuration rather than choosing a system that may not fit your cabinet.
Find an Under-Sink RO System That Fits Your Kitchen
Before installing a reverse osmosis system, consider your available cabinet space, electrical access, and long-term filter maintenance needs. Explore two tankless RO options and find replacement filters to help plan your setup.
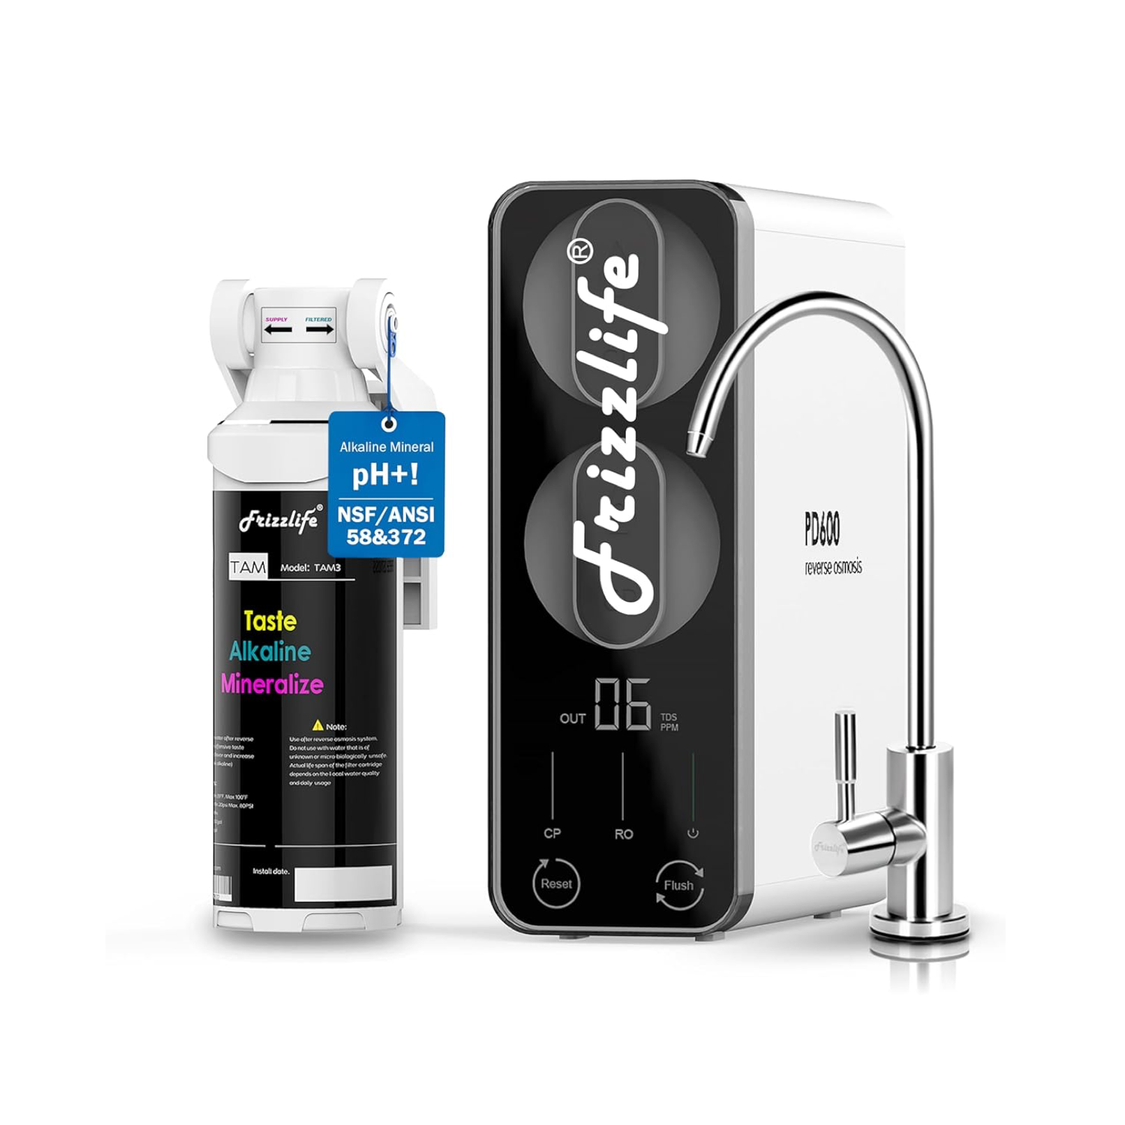
Frizzlife PD600-TAM3
A compact tankless reverse osmosis system with alkaline remineralization, designed for permanent under-sink installation where suitable electrical access is available.
- 600 GPD rated RO filtration capacity
- Tankless design saves cabinet space
- Alkaline remineralization stage
- Check outlet and installation clearance requirements
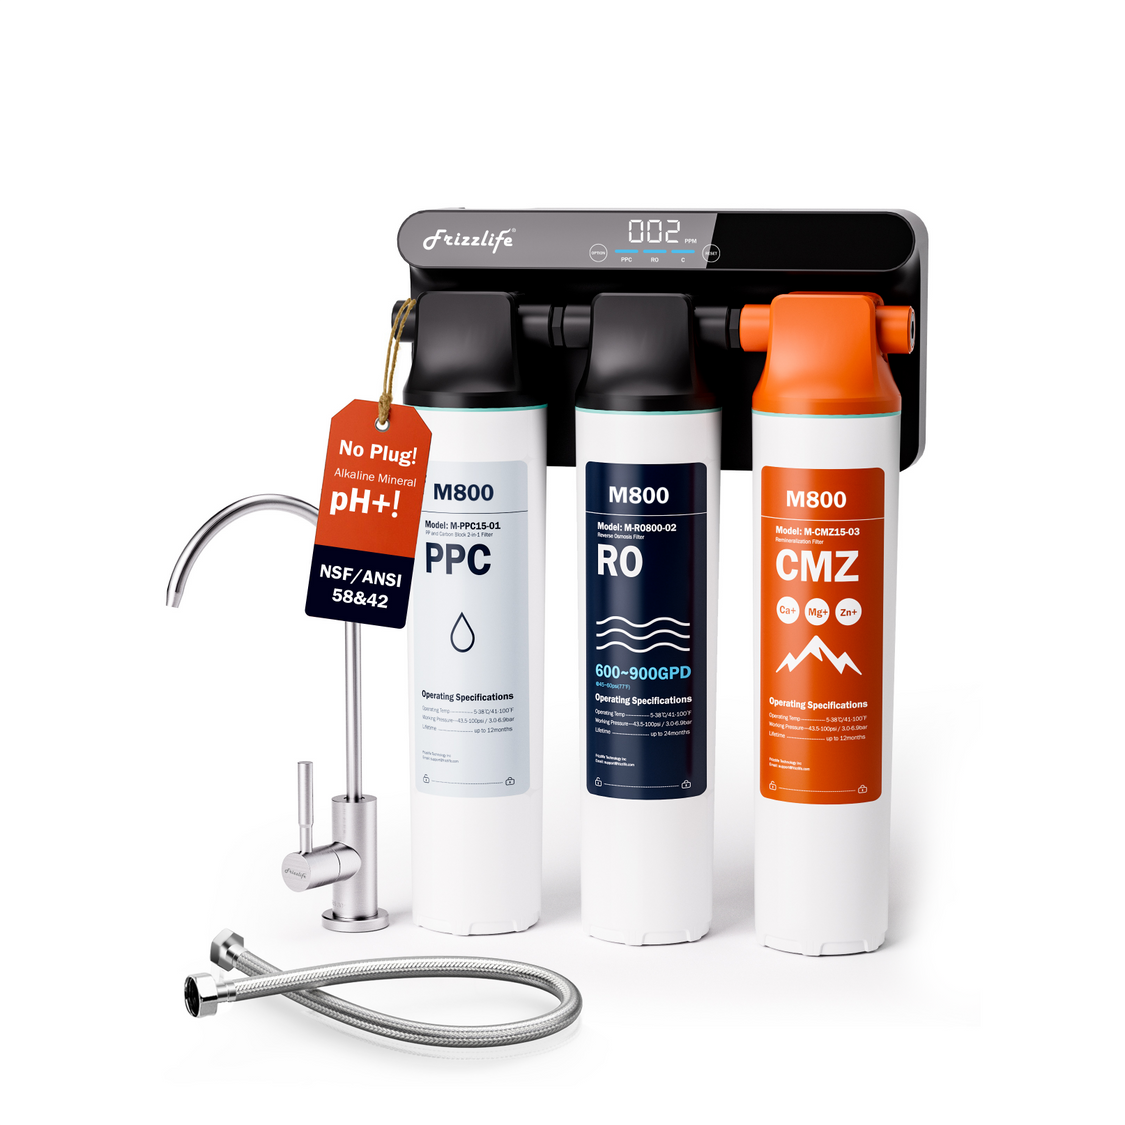
Frizzlife M800
A non-electric tankless reverse osmosis system for kitchens without a convenient under-sink power outlet. Its installation still requires compatible plumbing and sufficient cabinet space.
- Up to 900 GPD rated RO capacity
- No electrical outlet required
- Tankless under-sink configuration
- Verify water pressure and service clearance

Frizzlife Replacement Filters
Plan for maintenance before installing your RO system. Find model-specific replacement cartridges and make sure your cabinet layout leaves enough room for future filter changes.
- Replacement options for Frizzlife RO systems
- Find cartridges by compatible model
- Support long-term filter maintenance
- Check replacement procedures and schedules
What plumbing connections are needed for an under-sink RO system?
Most under-sink RO installations require four functional connections:
- Cold-water feed: A feed-water adapter or tee connects the system to the cold-water supply.
- Filtered-water outlet: Tubing carries treated water from the unit to the RO faucet.
- Drain connection: A drain tube carries concentrate water to an approved drain saddle or model-specific drain connection.
- Tank connection, when applicable: A separate tube runs between the RO system and storage tank.
Some systems have additional ports or inline components. Follow the supplied connection diagram rather than assuming that tubing colors or port positions are universal.
The feed adapter is generally installed between the cold-water shutoff valve and the existing faucet supply hose. Adapter and thread sizes vary. Do not force a nearly matching fitting or attempt to solve a mismatch with excessive thread-sealing tape.
Do you need to drill the sink or countertop for an RO faucet?
Most traditional under-sink RO systems use a dedicated drinking-water faucet. If the sink or countertop does not already have an appropriately sized opening, a new hole may be required.
Whether you should drill it yourself depends on the surface:
- A compatible metal sink deck may be manageable with the correct drill and bit.
- Porcelain-coated surfaces can chip if drilled incorrectly.
- Stone and other fragile countertops can crack or suffer permanent cosmetic damage.
- Some rental agreements, homeowner rules, or local requirements restrict drilling.
Check the faucet manual for the required opening size and allowable deck thickness. Do not rely on a generic hole measurement because faucet hardware varies.
Some jurisdictions or system designs may require an air-gap faucet. Others use a non-air-gap faucet and a direct drain saddle. Confirm the system configuration and local plumbing rules before drilling.
Can you reuse a sprayer or accessory hole instead of drilling a new faucet hole?
An unused soap-dispenser, sprayer, or other accessory opening can often provide a practical location for an RO faucet if the opening diameter, deck thickness, and under-sink clearance match the faucet requirements.
Before reusing the opening:
- Confirm that removing the accessory will not leave an active water line unsecured.
- Cap or disconnect unused plumbing correctly.
- Verify that a dishwasher air-gap arrangement is not being removed or altered improperly.
- Make sure the RO faucet’s washers and mounting nut can sit flat.
- Check that the faucet shank will not interfere with the sink bowl, disposal, or supply lines.
Connecting an RO system to the main kitchen faucet is possible only with certain product designs. Do not assume a standard under-sink system supports that arrangement unless the manufacturer specifically approves it.
Tools and materials to confirm before a DIY under sink RO installation
The exact tool list depends on the sink, countertop, plumbing, and system hardware. Commonly needed items include:
- Adjustable wrench
- Screwdrivers
- Drill and surface-appropriate bits if new holes are required
- Tubing cutter or another tool approved for making clean, square cuts
- Bucket or shallow pan
- Towels and dry paper towels
- Measuring tape and marker
- Flashlight
- Safety glasses
- Manufacturer-specified thread sealant, if required
- Included locking clips, adapters, washers, and mounting hardware
Inventory the entire kit before shutting off the water. Confirm that the faucet, feed adapter, drain saddle, tubing, filters, tank valve if applicable, and power adapter if applicable are present.
Do not apply thread-sealing tape to every connection. Push-fit, gasketed, compression, and threaded fittings seal differently. Use tape or sealant only where the installation manual instructs.
How to install RO system under sink: the correct connection sequence
The following sequence applies broadly to many systems, but the manual for your model takes priority:
- Clear and measure the cabinet.
- Shut off the cold water and relieve pressure.
- Install the dedicated RO faucet.
- Install the cold-water feed adapter.
- Install the drain saddle in an approved location.
- Mount or position the RO unit and storage tank.
- Install model-specific filters or external components.
- Cut, route, and connect the tubing.
- Connect power if the system requires it.
- Restore water slowly and inspect for leaks.
- Flush the system exactly as instructed.
Installing the faucet early is helpful because access to the mounting nut becomes more difficult after a large tank or filtration unit occupies the cabinet.
Shut off the cold water, relieve pressure, and install the feed-water adapter
Turn the cold-water shutoff valve clockwise until fully closed. Open the kitchen faucet to relieve pressure and verify that the cold-water flow stops.
If water continues flowing steadily, do not disconnect the supply line. The shutoff valve may require repair or replacement.
Place a towel and container below the valve. Disconnect the cold-water faucet supply hose, then install the provided feed-water adapter in the arrangement shown in the manual. Reconnect the faucet hose and attach the RO feed tube.
Avoid these mistakes:
- Connecting the RO unit to the hot-water line
- Cross-threading metal or plastic fittings
- Overtightening plastic parts
- Using an adapter that does not match the existing plumbing
- Applying sealant to fittings designed to seal with a gasket or compression surface
Keep the feed shutoff accessible after the rest of the system is installed.
Install the RO faucet according to the faucet and countertop requirements
Use an existing compatible opening when available. If drilling is necessary, protect the work area and follow the drilling method appropriate for the sink or countertop material. Hire a qualified professional when the surface is fragile or the correct drilling process is uncertain.
A typical faucet assembly uses a combination of a base plate or gasket above the sink and washers plus a mounting nut below it. The exact order varies, so use the supplied diagram.
Orient the faucet before tightening it. Confirm that:
- The spout can rotate or operate without hitting the backsplash
- The base sits flat
- The shank and tubing clear the sink bowl
- The mounting nut is secure but not excessively tightened
- The faucet tube follows a gentle route to the system
Position the drain saddle above the P-trap and away from disposal or dishwasher connections
The drain saddle carries the RO concentrate line into the sink drain. Choose an accessible pipe section above the P-trap and away from dishwasher discharge or garbage-disposal connections. Poor placement can contribute to noise, clogging, backflow, or leakage.

Follow the saddle template and instructions included with the system. Common procedures involve drilling through only one wall of the drain pipe, aligning the saddle opening with the drilled hole, and tightening the saddle evenly.
Key precautions include:
- Confirm the drain-pipe material and size are compatible with the supplied saddle.
- Do not drill through both sides of the pipe.
- Remove drilling debris.
- Align the gasket and saddle opening precisely.
- Tighten both sides evenly without cracking the drain pipe.
- Keep the drain tube from extending too far into the pipe if the manual warns against it.
- Verify local requirements for air-gap or drain connections.
If there is no safe, accessible drain location, stop the installation rather than improvising a connection.
Mount or position the RO unit, storage tank, and model-specific external components
Mount wall-supported equipment to a stable cabinet surface using the specified hardware. If the unit is designed to stand on the cabinet floor, place it on a level, dry surface where it will not be struck by stored objects.
For tank-based systems, install the tank valve as directed and position the tank so the valve remains accessible. Do not wedge it so tightly that it stresses the tubing.
For tankless or powered units:
- Confirm that the required outlet is available.
- Keep electrical connections dry and accessible.
- Do not plug in the unit until the manual directs you to do so.
- Install any external filters or other components in the specified flow direction.
If filters or the RO membrane are not preinstalled, insert them in the exact position and orientation shown in the product instructions.
Cut, route, and fully seat the feed, drain, tank, and faucet tubing without kinks
Tubing problems are among the most common causes of leaks and poor flow. Make every cut square and clean. A crushed, angled, or rough tube end may not seal correctly inside a push-fit connection.
For a typical push-fit port:
- Cut the tube squarely.
- Remove protective plugs if instructed.
- Push the tube straight into the fitting until it reaches the internal stop.
- Gently pull back to confirm it is retained.
- Install the locking clip when one is provided.
Do not guess which tube belongs in each port. Match every connection to the system diagram, including:
- Feed-water inlet
- Drain outlet
- Faucet or purified-water outlet
- Storage tank port
- External post-filter or remineralization components, if present
Route tubing with gradual curves. Avoid kinks, tight cable ties, cabinet hinges, pull-out tracks, and direct contact with sharp edges. Leave controlled service slack, but do not create a loose tangle that can be snagged by storage items.
Restore water slowly, check every connection for leaks, and flush according to the product manual
Close the RO faucet if directed, then slowly reopen the cold-water shutoff valve. Opening it gradually lets fittings pressurize in a controlled manner.
Inspect:
- Both sides of the feed-water adapter
- The RO feed-tube connection
- Every system port
- Filter housings or cartridges
- Tank valve and tank tube
- Faucet tubing
- Drain saddle and drain tube
- External inline components
Use dry paper towels around each joint. A small drop may be difficult to see against a damp cabinet but will show clearly on the paper. Recheck after the system has remained pressurized.
Initial flushing is essential, but the procedure varies considerably. Some systems require continuous faucet flushing, while tank-based systems may require filling and discarding one or more tanks. Follow the model manual rather than using a universal time.
Air and carbon fines can make startup water appear cloudy or gray. This often improves during the prescribed flush. Do not use the water for drinking until the full startup procedure is complete.
What are the most common mistakes during under-sink RO installation?
The most frequent problems are usually related to fit, connection quality, or failure to follow model-specific instructions.
Common mistakes include:
- Starting before confirming that the shutoff valve works
- Connecting the feed adapter to hot water
- Drilling a faucet opening without checking surface requirements
- Placing the drain saddle below the P-trap or too close to another discharge
- Drilling through both walls of the drain pipe
- Misaligning the saddle hole and gasket
- Cutting tubing at an angle
- Failing to push tubing fully into quick-connect fittings
- Reversing feed, drain, tank, or faucet tubes
- Kinking tubing behind the unit
- Overtightening plastic threads
- Applying thread tape to a connection that uses a gasket or compression seal
- Mounting the unit without filter-change clearance
- Forgetting that a powered system requires an outlet
- Skipping or shortening the manufacturer’s startup flush
- Failing to recheck for slow leaks after installation
Taking a photo of the cabinet before disconnecting anything can help document the original supply and drain arrangement. Labeling tubes during installation can also reduce port errors.
Troubleshoot leaks, poor flow, drain noise, cloudy startup water, and tubing connection problems
Leak at a push-fit connection:
Turn off the feed water and relieve pressure. Remove the locking clip if present, release the tube according to the fitting instructions, and inspect the end. Recut it squarely if it is scratched, crushed, or angled, then insert it fully.
Leak at the feed adapter:
Check that the fitting is correctly threaded, the gasket or washer is in the proper position, and the supply line is aligned. Do not keep tightening a plastic fitting that may be cross-threaded or cracked.
Water around the drain saddle:
Verify that the saddle opening and drilled hole are aligned. Inspect the gasket and confirm the clamp is tightened evenly. If the pipe or saddle is cracked, shut off the system and replace the damaged component.
Poor faucet flow:
Look for a partially closed feed valve, kinked tubing, an incorrectly positioned tank valve, reversed connections, or an incomplete startup cycle. Also compare the home’s water conditions with the operating requirements in the model manual.
Persistent drain noise:
Some drain flow during RO production is normal. Excessive gurgling can be associated with poor drain-tube routing, saddle placement, blockage, or an air-gap configuration. Check the model’s drain instructions before changing the layout.
Cloudy startup water:
Air can create a milky appearance that clears after standing, while new carbon filters may release harmless-looking dark fines during flushing. Continue the exact manufacturer-specified flush. If unusual appearance, odor, or taste persists after the required startup process, stop using the water and contact support.
System will not start:
For a powered model, check the approved power connection and confirm that the feed valve is open. Recheck filter installation and port connections. Do not open the electrical housing or bypass safety controls.
Should you skip under-sink RO and choose a countertop or different under-sink filtration instead?
Under-sink RO is not the right installation for every kitchen. The decision should be based on plumbing compatibility, drain access, faucet options, cabinet space, power availability, and willingness to maintain the system.
Choose professional installation for fragile countertops, corroded plumbing, non-standard fittings, or code-sensitive drain work
A qualified installer is appropriate when the project includes:
- Stone, porcelain, or another fragile drilling surface
- Corroded valves or supply lines
- Non-standard fittings
- Drain plumbing that must be rerouted
- An air-gap requirement you are unsure how to satisfy
- Electrical work for a powered system
- Rental, association, or local-code restrictions
- Signs of existing leakage or water damage
Professional installation does not eliminate the need to understand the layout. You will still need sufficient maintenance clearance and access to shutoff valves.
Consider countertop filtration when drilling, drain modification, cabinet space, or under-sink power is unavailable
A countertop system may be more practical when permanent modifications are not allowed, the cabinet is too crowded, or the kitchen lacks the required plumbing and electrical conditions.
Check the countertop unit’s own faucet compatibility, space requirements, and operating instructions. “Countertop” does not automatically mean that a product works with every faucet or requires no setup.
Consider a non-RO under-sink water filter when your setup cannot support an RO faucet or waste-water connection
Some kitchens can accommodate a direct-connect filter but not a reverse osmosis drain line, storage tank, or dedicated faucet. A non-RO unit may offer a simpler installation because certain designs connect to the existing cold-water line and faucet without an RO concentrate drain.
The capabilities and installation arrangements vary by product. Review Frizzlife under-sink water filter options only after confirming whether the selected model uses a dedicated faucet or connects to the existing faucet line.
Compare sink filtration options only after confirming space, plumbing, faucet, drain, and maintenance access
The most reliable way to install a reverse osmosis water filter is to make the compatibility decisions first. Confirm that the valve closes, identify the faucet opening, find a safe drain location, measure usable cabinet space, and plan filter access before ordering or drilling.
When those conditions are satisfied, under-sink RO installation is a realistic DIY project for many homeowners. When they are not, changing the filter configuration or hiring a professional is safer than forcing the installation into an unsuitable cabinet.