


A no drill under sink water filter can work without a new hole in the sink or countertop when the system connects directly between the cold-water shutoff valve and the existing kitchen faucet. This inline arrangement sends filtered cold water through the faucet you already use, eliminating the need for a separate drinking-water tap.
However, “no drill” does not always mean “no installation work.” You may still need to disconnect the faucet supply hose, install compatible fittings, route tubing, and secure the filter inside the cabinet. Some models also require a mounting bracket, while others may be allowed to stand on the cabinet floor. The exact requirements depend on the filter model and your plumbing.
Before choosing an under sink water filter without drilling, confirm four things:
-
The system is designed to feed the existing faucet, or you have an unused sink hole for a separate faucet.
-
The cold-water shutoff valve works and has compatible connections.
-
There is enough cabinet space for the filter, tubing, and cartridge changes.
-
Cabinet mounting can be completed without drilling, if avoiding all holes is important.
The following guide explains how to determine whether a no-drill installation will work—and when another filtration setup makes more sense.
Should you choose a no-drill under-sink filter for your kitchen setup — or avoid it?
Choose a direct-connect no-drill filter when you want to keep your existing kitchen faucet and can access its cold-water supply line. This is often the cleanest option for stone countertops, finished sinks, and kitchens where installing another faucet is undesirable.
Avoid assuming that every under-sink system is automatically no-drill. A system that requires a dedicated filtered-water faucet may still require a new countertop hole unless your sink already has an unused accessory opening. Cabinet mounting is a separate issue: even when no countertop drilling is needed, a wall-mounted filter bracket may require screws.
Decision Snapshot: A no-drill under-sink water filter works when it can feed your existing faucet through the cold-water line
The most straightforward setup follows this water path:
Cold-water shutoff valve → filter inlet → filtration system → filter outlet → existing faucet supply hose
With this configuration, the filter becomes part of the faucet’s cold-water supply. You continue using the same faucet and controls, but the cold water passes through the filter before reaching the faucet.
What “no drill” means for the countertop, plumbing connection, and cabinet mounting
The phrase no drill kitchen sink water filter can refer to several different installation conditions. Understanding the difference prevents surprises after purchase.
No sink or countertop drilling:
A direct-connect system uses the existing faucet, so no new faucet opening is needed. This is the primary meaning of “no drill” in most under-sink filter searches.
No new faucet, but basic plumbing work:
You will generally need to shut off the cold water, disconnect the faucet hose, add the supplied connection or adapter, and reconnect the water path through the filter. That is still a plumbing connection even though it does not involve cutting pipes or drilling the countertop.
No cabinet drilling:
This is model-dependent. Some systems may stand on the cabinet floor, while others are designed to hang from a screw-mounted bracket. Do not assume that a system can stand freely unless its installation instructions permit that orientation.
Conditionally no-drill installation:
A system with a dedicated drinking-water faucet can still avoid new drilling when the sink already has an appropriately sized unused hole, such as an opening previously used by a soap dispenser or side sprayer.
No-drill setup decision table: direct-connect filter vs. existing faucet hole vs. separate filtered faucet
|
Installation type |
New countertop hole? |
Uses existing kitchen faucet? |
Basic plumbing changes? |
Best suited to |
Main limitation
|
|---|---|---|---|---|---|
|
Direct-connect inline filter |
No |
Yes |
Yes—connects to the cold-water line |
Renters with permission, stone counters, and kitchens without a spare sink hole |
Fittings, valve condition, flow, and cabinet space must be compatible |
|
Dedicated filter faucet using an unused hole |
No new hole |
No |
Yes—adds a filtered-water line and faucet |
Sinks with an unused sprayer or soap-dispenser opening |
Existing hole must fit the faucet and be in a usable location |
|
Dedicated filter faucet requiring a new hole |
Yes |
No |
Yes |
Owners who want a separate filtered-water outlet |
Not a no-drill solution when no suitable hole already exists |
|
Faucet-mounted filter |
No |
Yes—attaches at the faucet outlet |
Usually no under-sink connection |
Kitchens where supply-line changes are prohibited |
Faucet compatibility and countertop clearance must be checked |
|
Model-specific RO setup |
Conditional |
Conditional |
Usually more involved; follow the model manual |
Users whose filtration goals call for the selected RO configuration |
Faucet, drain, adapter, space, and possible power requirements may prevent a no-drill installation |
Can an under-sink filter use the existing kitchen faucet?
Yes. A direct-connect under-sink filter can use the existing kitchen faucet when it is designed to install inline on the faucet’s cold-water supply.
The filter does not normally attach to the visible faucet spout. Instead, the under sink filter faucet connection is made inside the cabinet. The cold-water hose is disconnected from the shutoff valve, and the filter is inserted into that path using the supplied hoses, adapters, or fittings.
This approach has several practical effects:
-
The appearance of the sink deck remains unchanged.
-
There is no second faucet to install or clean around.
-
Cold water from the kitchen faucet passes through the filter.
-
The main faucet’s cold-water flow may change depending on the filter design, incoming pressure, cartridge condition, and tubing layout.
-
Hot water remains on its original supply path.
Check the selected model’s instructions carefully. A filter designed exclusively for a dedicated faucet should not be converted into a main-faucet system unless the manufacturer specifically supports that configuration.
If you plan to replace the main kitchen faucet at the same time, review Frizzlife’s filtered-water faucet options and confirm that the faucet and filter support the same connection layout before ordering.
What no-drill options are available for renters or apartments?
Renters generally have three possible no-drill arrangements:
-
A reversible direct-connect under-sink filter.
This preserves the countertop and can usually be removed later by reconnecting the original faucet hose. It still changes the under-sink water path, so obtain landlord or property-manager approval when required. -
A dedicated faucet installed in an existing accessory hole.
If the sink has an unused opening, a separate filtered faucet may be installed without drilling a new one. Removing an existing soap dispenser or side sprayer can affect how the kitchen functions, so confirm that the change is acceptable. -
A faucet-mounted filter.
When lease terms prohibit disconnecting supply hoses or mounting equipment inside the cabinet, a faucet-mounted option may be more appropriate. Frizzlife offers faucet water filter options for compatible faucet configurations.
“No drilling” does not automatically make an installation lease-compliant. A direct-connect filter is relatively reversible, but it still involves water-supply fittings and carries leak risk if installed incorrectly. Keep the original parts, document the original plumbing arrangement, and follow the product manual when removing the system.
Protect the cabinet during installation by placing a towel or shallow container under the connection. After installation, inspect the fittings immediately and again after the system has been under pressure.
Compare Filtration Options for Your Kitchen Setup
Your best option depends on whether you want to avoid plumbing changes completely, prefer a permanent reverse osmosis setup, or already own a Frizzlife system and need replacement filters.

No Plumbing Alternative
Frizzlife WB99 Countertop RO System
Want reverse osmosis water without changing the cold-water line or drilling the sink? A countertop RO system such as WB99 is worth considering when permanent under-sink installation is not ideal.
View WB99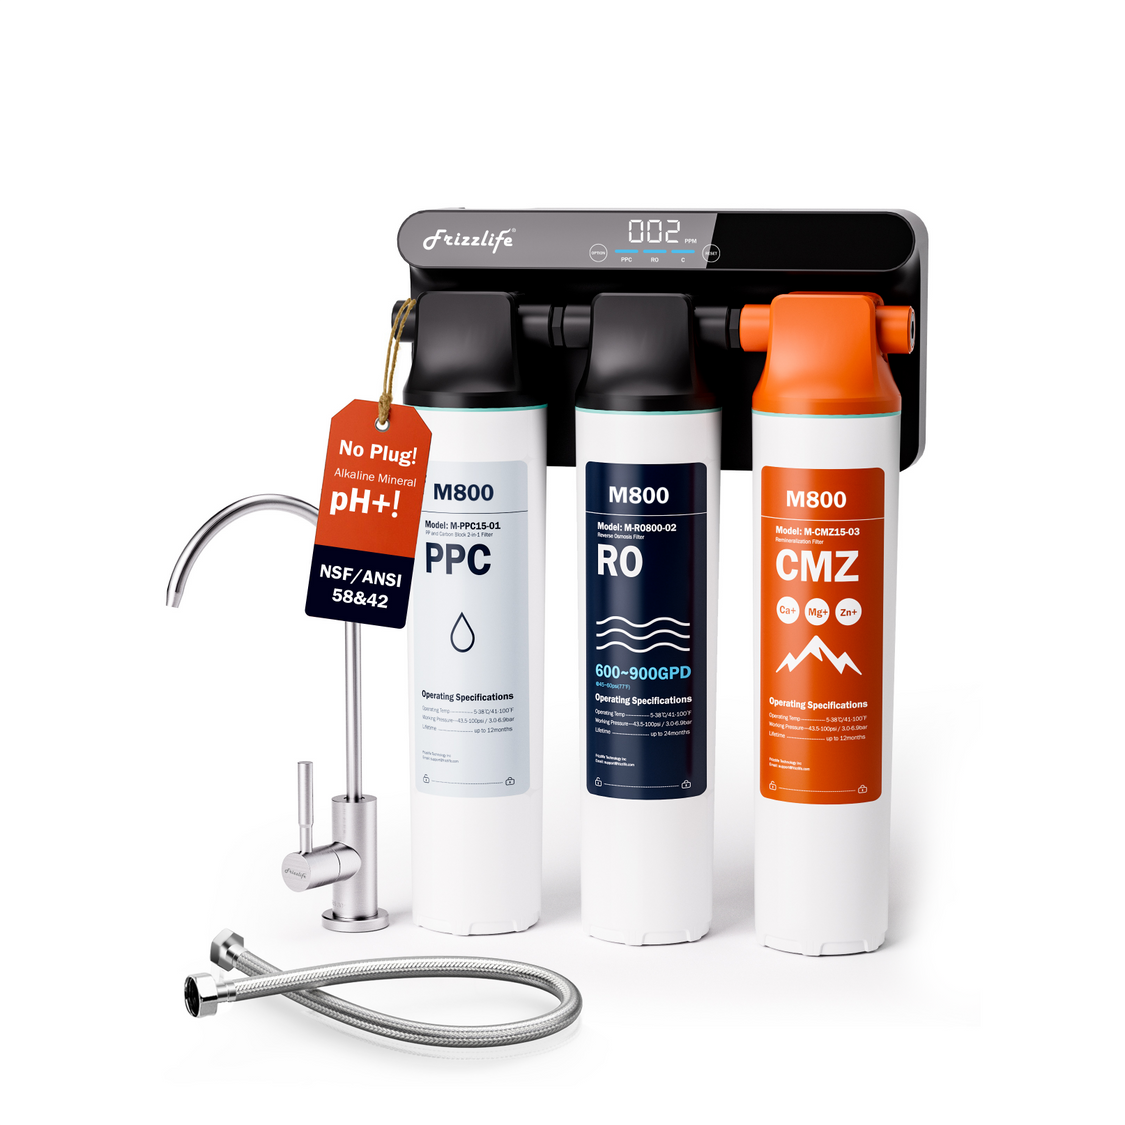
Permanent RO Setup
Frizzlife M800 RO System
If a permanent kitchen RO installation is acceptable, compare M800 with countertop and direct-connect options before deciding which installation style fits your kitchen.
View M800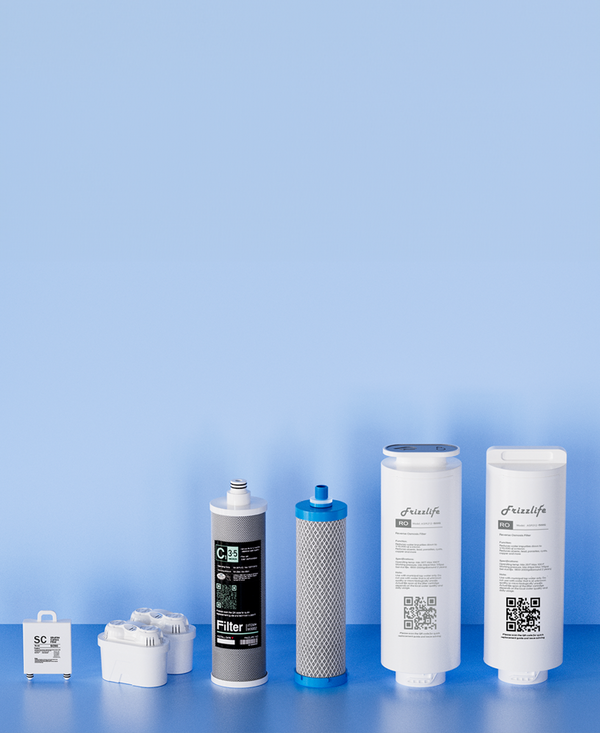
For Existing Systems
Find Your Replacement Filters
Already using a Frizzlife filtration system? Find the replacement filter options for your model and keep routine filter maintenance on schedule.
Find Replacement FiltersChoose an RO system only if its no-drill faucet adapter or diverter is compatible
Do not assume that an RO system is a true no-drill substitute for a standard direct-connect filter. Requirements vary substantially by model.
Before selecting an RO system for a no-drill installation, verify:
-
Whether it feeds the existing faucet or requires a dedicated filtered-water faucet.
-
Whether a manufacturer-supported faucet adapter or diverter is available for your faucet.
-
Whether the system needs a drain connection.
-
Whether electrical power is required.
-
Whether there is enough space for the full system and service access.
-
Whether the installation method is permitted by your lease or countertop warranty.
A countertop faucet adapter can avoid drilling only when it is explicitly compatible with both the faucet and the selected system. Pull-down, pull-out, sensor-controlled, and unusually threaded faucets may not accept a typical diverter.
If the RO system requires its own faucet and you have no suitable unused sink hole, the installation is not genuinely no-drill. Do not improvise a connection or use an unapproved adapter merely to avoid making a hole.
Avoid a separate filtered faucet unless you have a suitable unused hole
A dedicated filtered-water faucet conflicts with a strict no-drill requirement when the sink or countertop has no suitable unused opening. This is especially important with granite, quartz, marble, undermount sinks, limited deck space, landlord restrictions, or warranties that restrict drilling.
If no suitable opening is available, choose a direct-connect system designed to feed the existing kitchen faucet, consider a compatible faucet-mounted filter, or consult a qualified installer. Do not buy a separate-faucet system first and assume an unapproved adapter will solve the installation later.
A separate faucet can still be installed without making a new hole when the sink already has a correctly sized accessory opening, such as one previously used for:
-
A side sprayer
-
A soap dispenser
-
An instant-hot-water faucet
-
Another removable sink accessory
Measure the opening and compare it with the faucet’s model-specific mounting requirements. Check above and below the opening for enough room for the faucet base, mounting hardware, tubing, and normal operation. Before removing a side sprayer, confirm how it connects to the main faucet; some faucet assemblies may leak or operate incorrectly if the original sprayer components are simply disconnected.
If the opening is suitable, compare Frizzlife’s drinking-water faucets, then confirm compatibility with the selected filtration system rather than choosing by appearance alone.
Consider a faucet-mounted filter when under-sink plumbing changes are not permitted
A faucet-mounted filter may be the more practical choice when you cannot:
-
Disconnect the cold-water supply hose.
-
Add adapters beneath the sink.
-
mount equipment inside the cabinet.
-
Obtain permission for an under-sink installation.
-
Fit a filtration system around a disposer, drain trap, or pull-out storage.
Faucet-mounted filters also avoid the need for an under-sink cartridge footprint. However, they are not universally compatible. Check the faucet outlet and thread arrangement, especially if you have an integrated spray head, pull-down spout, or nonstandard aerator.
Will a no-drill water filter for a kitchen sink physically fit and install cleanly under your sink?
A no-drill connection solves only the countertop question. The system must still fit inside the cabinet without interfering with plumbing, storage, doors, drawers, or future maintenance.
Measure before ordering. Do not rely on a general statement that an under-sink filter is “compact,” because dimensions, cartridge orientation, and mounting requirements differ by model.
What should you check before choosing a no-drill water filter setup?
Use this pre-purchase checklist:
-
Faucet configuration: Does the filter use the existing faucet or require a separate one?
-
Cold-water access: Can you clearly identify and reach the cold-water shutoff valve?
-
Valve operation: Does the valve close completely without sticking or leaking?
-
Supply hose: Is there an accessible flexible hose between the valve and faucet?
-
Connection size: Do the valve, faucet hose, and supplied filter fittings match?
-
Adapter availability: Does the exact model include the converters your setup needs?
-
Cabinet footprint: Is there enough width, depth, and height for the unit?
-
Service clearance: Can the cartridge be removed without disconnecting the system?
-
Tubing route: Can hoses reach their connections without stretching or kinking?
-
Mounting method: Can the filter stand freely, or does its bracket require screws?
-
Water pressure: Does your water pressure fall within the selected model’s specified operating range?
-
Property restrictions: Does your landlord permit supply-line connections or cabinet mounting?
-
Installation instructions: Are the manual and required parts available before you begin?
Take photos of the faucet hose, valve, surrounding plumbing, and cabinet space. These can help Frizzlife support or a plumber identify potential compatibility issues before the original line is disconnected.
Confirm that the cold-water shutoff valve works and the faucet uses an accessible supply hose
The shutoff valve is one of the most important parts of an easy install under sink water filter setup. It must stop the cold-water flow completely before the faucet line is removed.
To identify the cold side, trace the supply hose from the faucet. In many kitchens, the cold valve is on the right, but plumbing layouts can vary. Do not rely on position alone.
Test the valve before beginning:
-
Turn off the suspected cold-water valve.
-
Open the faucet on cold.
-
Allow the initial pressure to release.
-
Confirm that the water stops.
If water continues running, the valve may not be closing completely or you may have selected the wrong valve. Do not disconnect the hose until the supply is reliably off.
The easiest installations usually involve an accessible flexible faucet hose threaded onto an under-sink shutoff valve. Rigid, concealed, corroded, or unusual plumbing may require additional work and should not be forced into a standard direct-connect arrangement.
Check fitting sizes and model-specific adapters before disconnecting the faucet line
Connection compatibility is model-specific. Under-sink valves and faucet hoses do not all use the same thread size or fitting type.
For example, the Frizzlife MK99 product information states that the model includes converter fittings for certain 3/8-inch and 1/2-inch connections. That information should not be generalized to every Frizzlife under-sink filter. Check the parts list for the exact model being considered.
Before installation:
-
Compare the valve outlet with the supplied inlet fitting.
-
Compare the faucet hose end with the filter outlet or supplied adapter.
-
Confirm whether the connection uses straight threads, tapered pipe threads, or a compression seal.
-
Make sure washers and O-rings are present where specified.
-
Check for damaged threads, flattened washers, or debris on sealing surfaces.
Do not solve a mismatch by forcing two fittings together. A connection can appear to engage while using incompatible threads, damaging the fitting and causing a leak when the system is pressurized.
Use PTFE thread-seal tape only where the product manual calls for it. Compression fittings and connections that seal with a washer or O-ring often rely on those sealing components rather than tape. Applying tape to the wrong connection may interfere with proper seating.
Measure the filter footprint, tubing path, and cartridge-replacement clearance

Measure the available cabinet area in three dimensions:
-
Height from the cabinet floor to the sink basin or mounting point
-
Width between the cabinet wall, disposer, drain trap, and stored items
-
Depth from the cabinet opening to the rear wall
Then identify the space needed to remove the cartridge. Frizzlife guidance for one no-drill configuration discusses approximately 10–12 inches or more of clearance, but that is not a universal requirement. The exact service space depends on the selected filter’s dimensions and cartridge-change method.
Plan the tubing path at the same time. Hoses should not:
-
Fold around sharp corners
-
Rub against moving drawers or pull-out trash bins
-
Rest against sharp cabinet hardware
-
Hang where stored items can pull on them
-
Press against the drain trap or disposer
-
Bend tightly immediately beside a fitting
Leave a smooth path with enough slack for installation and maintenance, but avoid large unsupported loops that can be snagged.
Verify whether the unit can stand freely or requires holes for a cabinet-mounting bracket
“No countertop drilling” and “no cabinet drilling” are separate claims.
Check the installation manual to determine whether the selected system:
-
Must be secured with a wall bracket
-
May stand vertically on the cabinet floor
-
Uses a model-specific base or support
-
Requires a particular orientation for safe operation and cartridge replacement
Do not leave a wall-mount-only system loose inside the cabinet. Movement can put stress on tubing and fittings, especially when items are placed beside the unit.
Likewise, do not substitute adhesive strips or suction mounts unless they are part of the approved installation method. Cabinet surfaces may be dusty, textured, damp, or unable to hold the system’s weight reliably.
If bracket screws are required and your goal is absolutely no drilling anywhere, choose a model whose approved installation method allows it to stand freely.
Prevent leaks by matching threads, supporting hoses, and tightening fittings correctly

A leak-free installation depends more on correct fitting assembly than on maximum tightening force.
Follow these practices:
-
Start threaded connections by hand to avoid cross-threading.
-
Make sure washers and O-rings sit flat and remain undamaged.
-
Push quick-connect tubing fully to the specified depth.
-
Cut tubing squarely if the manual requires it to be trimmed.
-
Support the valve and nearby plumbing while tightening.
-
Use two tools when instructed so one fitting does not twist the connected pipe.
-
Apply thread sealant only to connections for which it is specified.
-
Avoid both loose fittings and excessive tightening.
Overtightening can damage plastic components, distort washers, or crack a fitting. If a connection leaks, shut off the water and inspect the sealing surfaces instead of repeatedly tightening it under pressure.
Continue checking the cabinet during the first period of use and after cartridge maintenance. A small drip can damage cabinet materials before it becomes visible outside the sink base.
Troubleshoot mismatched adapters, connection leaks, kinked tubing, and reduced faucet flow
The adapter does not fit the shutoff valve
Stop and compare the thread type and size. Do not force the adapter. Confirm that you are using the correct model-specific converter and that an old adapter has not remained attached to the valve or faucet hose. Contact Frizzlife support or a plumber if the connection cannot be identified confidently.
A threaded connection leaks
Turn off the water and relieve pressure. Disassemble the connection and inspect for:
-
Cross-threading
-
A missing or damaged washer
-
A pinched O-ring
-
Debris on the sealing surface
-
An incorrect adapter
-
Improper use or absence of thread sealant where the manual specifies it
Reassemble according to the manual. Do not attempt to stop a persistent mismatch by adding multiple layers of tape.
A quick-connect fitting leaks
Shut off the water, depressurize the system, and remove the tubing according to the fitting instructions. Confirm that the tube end is square, smooth, and fully inserted. Replace visibly damaged tubing rather than reinserting a scratched or crushed section.
The tubing kinks
Reroute it with a wider bend. Do not leave kinked tubing in service because it can restrict flow and place stress on the connection. If the supplied hose cannot reach without a sharp bend, verify the approved extension or installation method for that model.
Cold-water flow is lower after installation
Some change in flow may occur because water now passes through filtration media. An unexpectedly large reduction can result from:
-
A partially closed shutoff valve
-
Kinked or pinched tubing
-
Reversed inlet and outlet connections
-
An incompletely seated fitting
-
Low incoming pressure
-
A cartridge that needs service or replacement
-
A model that is not intended to supply the main kitchen faucet
Check the simple installation causes first. If the plumbing path is correct, compare the observed performance with the selected model’s documentation.
The water looks cloudy immediately after installation
Trapped air can make newly filtered water appear temporarily cloudy. Follow the specified flushing procedure. If unusual appearance, particles, odor, or taste persists after the required flush, stop using the system and consult the manufacturer’s instructions or support team.
Stop the DIY installation if the valve is stuck, corroded, damaged, or cannot fully shut off
A no-drill installation should not proceed when the cold-water supply cannot be controlled safely.
Stop and contact a qualified plumber if:
-
The shutoff valve will not close completely.
-
The valve handle is stuck or begins to deform.
-
The valve or supply pipe moves inside the wall.
-
Threads are heavily corroded or damaged.
-
Water leaks from the valve stem or wall connection.
-
The faucet uses rigid or inaccessible piping you cannot disconnect safely.
-
No local shutoff is present and you are not prepared to isolate the home’s water supply.
-
A fitting remains wet after correct reassembly.
-
You are uncertain whether an adapter is compatible.
Avoiding a countertop hole is not worth risking a broken valve or concealed water damage. In older plumbing, replacing or repairing the shutoff valve may be necessary before any under-sink filter can be installed reliably.
A no drill under sink water filter is ultimately a good choice when the selected system is designed for direct connection, the cold-water plumbing is accessible and compatible, and the cabinet provides enough room for secure installation and maintenance. If the system requires a separate faucet, no-drill installation remains possible only when a suitable existing hole or approved adapter is available. Verify those conditions before purchase, follow the exact model manual, and stop when plumbing components show signs of damage.
References
https://www.cdc.gov/drinking-water/about/about-home-water-treatment-systems.html