


Yes, you can install a reverse osmosis faucet on a granite countertop. The installation may require drilling a new opening with a correctly sized diamond core bit, but the exact hole diameter, drilling location, and mounting requirements depend on the faucet model and countertop.
If you are researching how to drill a hole in granite countertop for water filter installation, do not begin with a “standard” bit size. Begin with the actual faucet and its installation manual. RO and drinking-water faucet requirements vary significantly: documented installation instructions range from approximately 1/2 inch to 1 3/8 inches, depending on the product.
Granite can chip or crack when drilled incorrectly. A sound countertop, a variable-speed drill with hammer mode switched off, a diamond hole saw, continuous cooling, and light pressure can make DIY installation possible. Visible cracks, seams, narrow stone margins, warranty restrictions, or uncertain under-counter clearance are reasons to have a countertop professional drill the hole instead.
Can you drill a hole in a granite countertop for an RO faucet?
Yes—but granite requires the correct diamond bit, controlled drilling, and model-specific measurements
A granite countertop can be drilled for an RO or filtered-water faucet, but granite is not drilled like wood, laminate, or stainless steel. The normal tool is a diamond core bit or diamond-tipped hole saw designed for wet drilling in natural stone.
The basic technique is to:
-
Confirm the faucet’s required finished hole diameter.
-
Inspect the stone and the space below it.
-
Stabilize the hole saw so it cannot skate across the polished surface.
-
Drill at low speed with light, steady pressure.
-
Keep the diamond cutting surface cool with water.
-
Switch off all hammer or percussion settings.
-
Reduce pressure as the bit approaches breakthrough.
The difficulty is not simply cutting through hard stone. You must create an accurately placed opening without damaging the surrounding granite, hitting the sink rim or cabinet hardware, or leaving a hole that the faucet cannot cover and secure.
Key Takeaway: confirm the faucet, countertop, and under-sink fit before drilling
Before drilling, answer all five of these questions:
-
What finished hole diameter does the faucet manual specify?
-
Can the mounting stem pass through the hole while the base fully covers it?
-
Can the retaining nut and other mounting hardware reach through the countertop?
-
Is the stone sound and sufficiently clear of seams, cracks, edges, and existing cutouts?
-
Is there room below for the stem, nut, tubing, sink rim, disposal, plumbing, and cabinet structure?
Do not estimate from a product image or copy the dimensions used for another faucet. Having the faucet and its complete mounting hardware available before drilling is the safest way to verify fit.
Reuse an existing sink or soap-dispenser hole when its size and location are compatible
An unused soap-dispenser or sink-accessory hole can often eliminate the need for drilling granite. It is usable only when:
-
Its diameter falls within the faucet manufacturer’s permitted range.
-
The faucet base and gasket cover the opening completely.
-
The mounting stem fits without being forced.
-
The retaining nut has enough flat surface below to tighten correctly.
-
The location allows tubing to run without kinks or contact with moving or hot components.
-
The faucet can discharge into the sink in a practical direction.
Remove the old accessory and measure the opening from several directions. An existing hole may be irregular, slightly chipped, or partially blocked underneath by the sink rim. Confirm both top and bottom clearance rather than relying on the visible opening alone.
RO faucet hole size and granite countertop fit

Only works if the granite countertop has the right hole size for RO faucet mounting
A successful granite countertop water filter faucet hole must satisfy two requirements: the mounting stem must pass through it, and the faucet must still have enough stone around the opening to sit securely.
A hole that is too small prevents the stem or attached tubing from passing through. A hole that is too large may leave too little support for the gasket and retaining hardware. It can also remain visible beyond the faucet base.
The required opening is not necessarily the same size as the decorative base. Check the diameter of the threaded stem or mounting shank, any tubing that must pass through the opening, and the manual’s stated installation diameter. Do not size the hole by measuring only the faucet’s exterior trim.
Why there is no universal RO faucet hole size for granite
RO faucet instructions document required openings from approximately 1/2 inch to 1 3/8 inches, with other models falling between those dimensions. These figures demonstrate the variation; they are not a universal range that guarantees compatibility.
Some faucets use a narrow mounting stem. Others need a wider opening because of their mounting design or because multiple lines pass through the countertop. Air-gap RO faucets may also have additional tubing requirements.
Therefore, neither 1 inch nor 1 3/8 inches should be treated as the automatic answer to “What size hole does an RO faucet need?” The correct size is the finished diameter specified in the installation instructions for the faucet being installed.
Check the faucet manual, mounting stem, gasket, base coverage, and retaining nut
Evaluate the complete mounting assembly before choosing a bit:
-
Installation manual: Look for the required or permitted countertop opening.
-
Mounting stem: Confirm that the full stem, fittings, and attached lines can pass through.
-
Base or escutcheon: It must cover the opening and any minor surface irregularity.
-
Gasket: It should rest on flat stone rather than dropping into an oversized hole.
-
Retaining nut or bracket: It needs adequate contact below the granite.
-
Washer orientation: Follow the illustrated assembly order in the manual.
-
Faucet orientation: Confirm that the spout can be aligned before the lower hardware is tightened.
Do not enlarge the specified opening simply to make installation easier. Extra clearance can reduce the mounting area and create a faucet that shifts or wobbles.
Measure countertop thickness and confirm the mounting hardware can reach
Granite thickness and any added substrate affect mounting. The threaded portion must extend far enough below the complete mounting surface for the washer, bracket, and retaining nut to engage as intended.
Look below the intended location for plywood, reinforcement, adhesive buildup, sink clips, or the flange of an undermount sink. The visible granite thickness may not represent the full distance the mounting hardware must cross.
If the stem appears too short, do not grind away granite or remove structural material without approval. Choose a compatible faucet or consult the faucet supplier and countertop fabricator.
Map under-sink clearance for tubing, plumbing, the sink rim, disposal, and cabinet supports
A clear location above the counter may be blocked underneath. Before drilling, identify:
-
The sink bowl and undermount sink rim
-
Faucet mounting hardware
-
Garbage disposal body and electrical connections
-
Drainpipes and dishwasher hose
-
Water supply lines and shutoff valves
-
Cabinet braces, dividers, and drawer clearances
-
RO tank, filter housings, or other system components
-
The route from the filter outlet to the faucet
-
Drain tubing required by an air-gap faucet, where applicable
Hold the mounting nut or bracket under the proposed position to make sure there is room to turn and tighten it. Also verify that you can reach the location with normal hand tools after the faucet is inserted.
Choose a faucet location that avoids seams, damaged stone, edges, and hidden obstructions
Select a position where the faucet can dispense into the sink and where the surrounding granite appears sound. Avoid drilling through or immediately beside:
-
A countertop seam
-
A visible crack or repaired fracture
-
Existing chips
-
A narrow strip of stone around the sink cutout
-
An unsupported edge or overhang
-
An area with unknown reinforcement
-
The concealed rim of an undermount sink
There is no single safe edge distance for every countertop. Stone thickness, cutout geometry, reinforcement, seam position, and existing damage all affect risk. Ask the original fabricator or another countertop professional to assess a questionable location.
Once you know the required opening and mounting conditions, compare those measurements with the specifications for available drinking water faucets before committing to the hole.
Planning the Full RO Setup?
If you are preparing a dedicated countertop opening for an RO faucet, it is also a good time to confirm the filtration system, under-sink space, and future filter replacement plan before making permanent changes to the countertop.
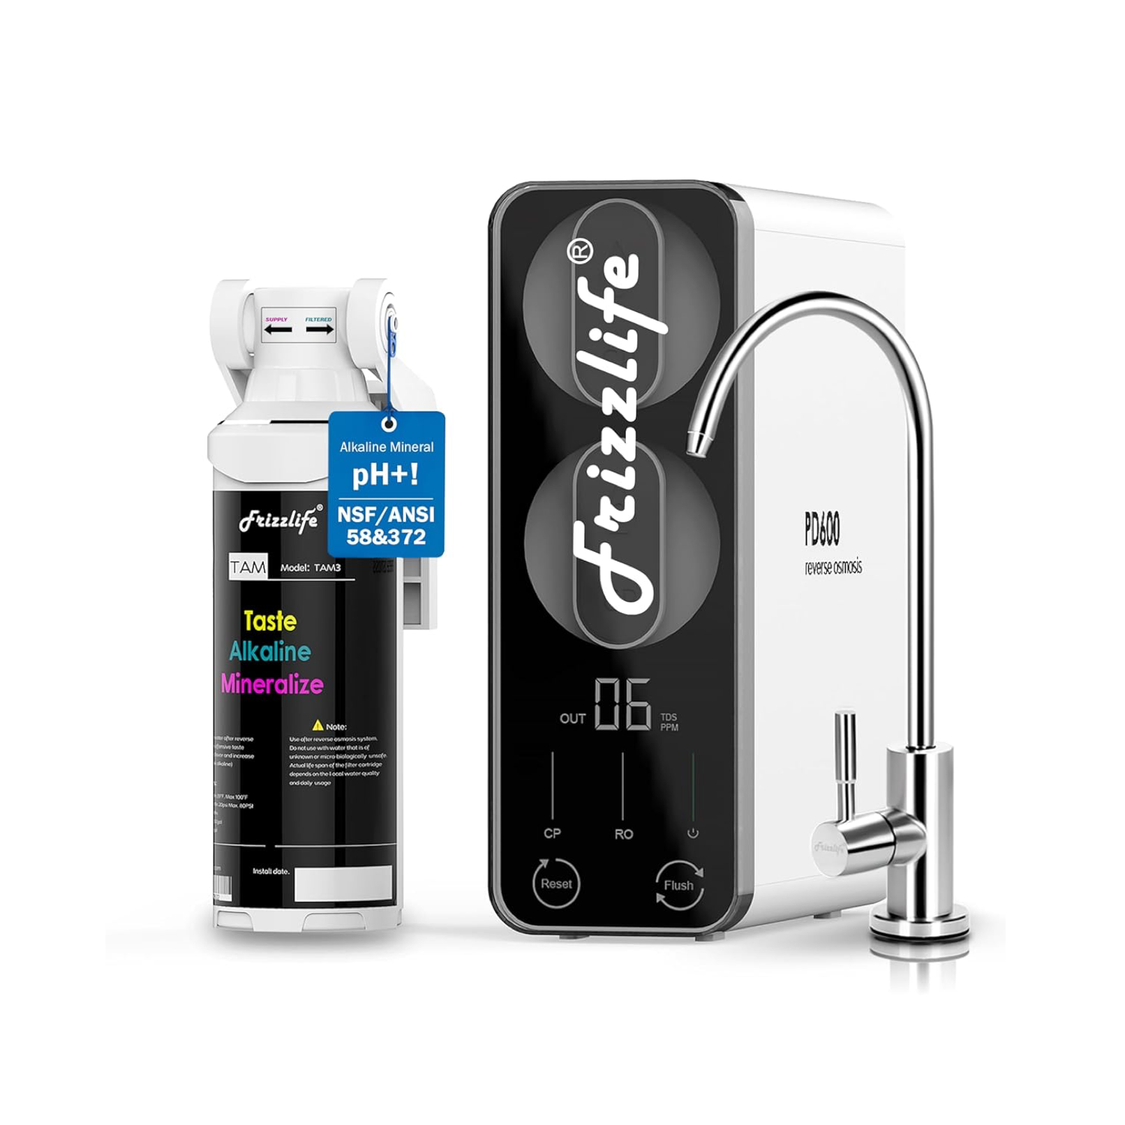
Under-Sink RO Option
PD600-TAM3
Explore this Frizzlife reverse osmosis system when planning a permanent under-sink setup with a dedicated drinking-water faucet.
View PD600-TAM3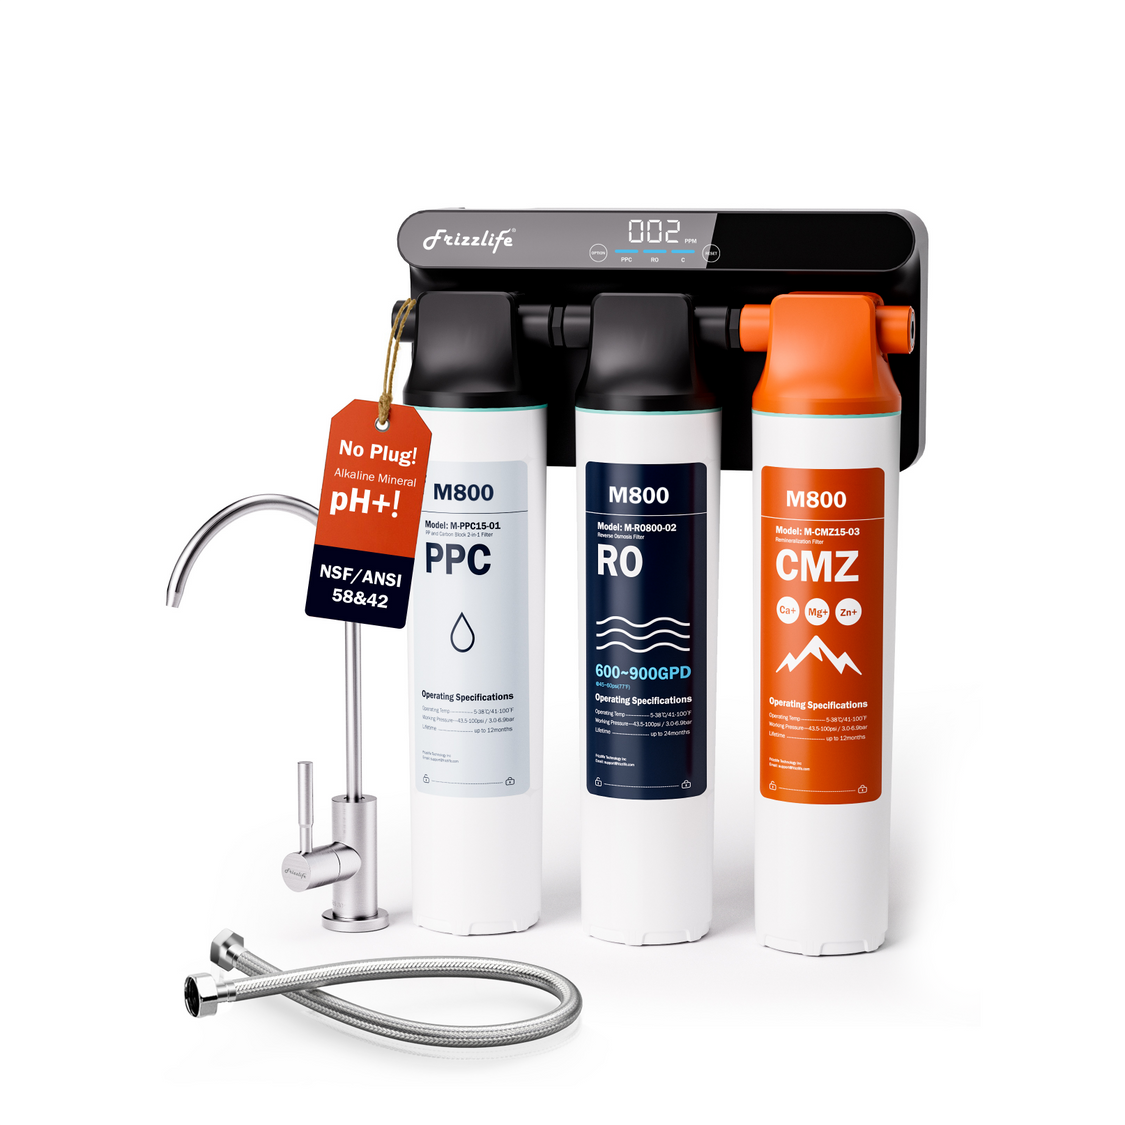
Under-Sink RO Option
M800
Another option to compare when the installation plan includes an under-sink RO system and a separate countertop drinking-water faucet.
View M800
Maintenance & Replacements
Replacement Filters
Already own a Frizzlife system? Find the compatible replacement-filter options for routine system maintenance.
Find Replacement FiltersTools and preparation for drilling granite
Use a correctly sized diamond core bit or diamond-tipped hole saw
For drilling granite for a water filter faucet, use a diamond core bit or diamond-tipped hole saw intended for natural stone. Its finished cutting diameter must match the faucet instructions.
A general-purpose twist bit, wood hole saw, or ordinary masonry bit is not a substitute. A conventional masonry tool may chip the polished surface and does not provide the clean circular cut needed for faucet mounting.
Some installation manuals describe a pilot-hole or staged enlargement sequence. Others call for drilling directly with a diamond core bit. Follow the faucet and tool instructions rather than assuming every granite hole uses the same sequence.
Use a variable-speed drill with hammer or percussion mode switched off
Use a drill that allows controlled operation at low speed. If it has hammer, impact, or percussion settings, switch them off and verify that the selector cannot move accidentally.
Hammer action repeatedly strikes the stone. That impact increases the risk of cracking, especially near sink cutouts, seams, thin sections, or existing damage.
Also confirm that the drill and bit are compatible. Some larger core bits require a particular arbor, chuck capacity, or drill configuration.
Prepare masking tape, a marker, a stable guide, cooling water, and slurry protection
Useful preparation materials include:
-
Masking or painter’s tape
-
A nonpermanent marker
-
A hole-saw guide or securely clamped template
-
Clean cooling water delivered according to the bit instructions
-
Towels, plastic sheeting, and a container for slurry
-
A sponge or wet vacuum suitable for the task
-
Adequate lighting above and below the countertop
-
Eye and hearing protection
Tape helps with marking and surface protection, but it does not reliably prevent a rotating core bit from wandering. A stable commercial guide or properly secured template gives better control.
Wear eye and hearing protection and keep electricity away from cooling water
Wet drilling combines power tools and water, so plan the water supply before starting. Protect electrical connections from spray and runoff, and keep cords and plugs out of wet areas. Do not allow slurry to flow into electrical outlets, appliances, cabinet wiring, or disposal connections.
Wear eye protection against stone particles and slurry. Hearing protection is also appropriate. Avoid loose clothing and secure long hair before operating the drill.
If you cannot control water safely around the drill and nearby electrical equipment, stop and hire a professional.
Check the countertop warranty and ask the fabricator about drilling restrictions
Countertop warranties vary. Homeowner drilling, an unauthorized modification, or damage associated with a new opening may affect coverage.
Before altering the granite:
-
Review the countertop warranty.
-
Contact the fabricator or installer when possible.
-
Ask whether the slab contains reinforcement near the proposed location.
-
Confirm whether professional drilling is required to preserve coverage.
-
Ask whether the position is too close to a seam, cutout, or repaired area.
Approval for the faucet installation does not automatically mean accidental stone damage will be covered.
How to drill a hole in granite countertop for water filter
The following process describes the general method for a diamond hole saw. The faucet manual, countertop fabricator’s instructions, and diamond-bit manufacturer’s requirements take priority.
1. Verify the exact finished hole diameter in the faucet installation manual
Have the faucet, gasket, washers, retaining nut, tubing, and manual in front of you. Confirm the required finished diameter and whether the instructions specify a pilot hole, template, or staged drilling process.
Do not choose a bit based only on a “typical RO faucet hole size.” If the required dimension is unclear, contact the faucet supplier before modifying the granite.
2. Inspect the granite and confirm the drilling location from above and below
Examine the polished surface under strong light. Look for cracks, chips, seams, filled areas, or color lines that may indicate a natural feature requiring professional evaluation.
Then inspect from inside the cabinet. Confirm that the core bit will not contact the sink rim, mounting clips, plumbing, wiring, supports, or appliances. Make sure there is enough room to install and tighten the faucet hardware.
3. Protect the work area, apply tape, and mark the hole center
Remove objects from the counter and cabinet. Protect the sink, backsplash, cabinetry, disposal, and plumbing from slurry.
Apply tape over the drilling area and mark the exact center. Recheck the center against the faucet base and underside clearance. A small positioning error can make the lower nut inaccessible even if the faucet looks correctly placed from above.
4. Secure a drilling guide or establish a shallow starting groove without letting the bit skate
A core bit has no conventional center point, so it may slide across polished granite before the cutting edge establishes a groove. A securely fixed guide is the most controlled starting method.
Where the bit manufacturer permits an angled start, place part of the diamond rim against the marked circle and form a shallow crescent-shaped groove at low speed. Gradually bring the drill upright only after the rim is captured. This technique requires steady control; if you are not comfortable with it, use a guide or hire a professional.
Do not strike the granite with a punch unless the relevant installation instructions specifically call for that method.
5. Start at low speed with light, steady pressure
Begin slowly and keep the drill controlled with both hands. Apply only enough pressure to maintain consistent contact.
The diamond surface removes granite by abrasion. Excessive force does not necessarily speed the cut; it can increase heat, binding, vibration, and damage risk. Expect progress to be gradual.
6. Keep the diamond bit continuously cool while controlling water and stone slurry
Use the cooling method required by the core-bit manufacturer. Maintain enough clean water at the cutting edge to control heat and carry away stone particles.
Pause if necessary to clear slurry and confirm that cooling water is reaching the diamond rim. Do not allow the bit to run dry if it is designed for wet cutting.
Contain the resulting slurry so it does not enter cabinet seams, electrical components, the disposal, or other sensitive areas.
7. Bring the drill upright and maintain controlled alignment through the granite
Once a complete groove has formed, gradually align the drill perpendicular to the countertop. Keep the bit centered in the track without rocking it aggressively.
Poor alignment can widen the top of the hole, chip the rim, or cause the core bit to bind. If the tool begins to vibrate or pull sideways, release the trigger and investigate rather than trying to force it back on course while spinning.
8. Slow down near breakthrough to reduce edge chipping
As the bit nears the underside, reduce pressure and maintain control. Pushing hard through the final section can cause a rough breakout below the countertop.
Avoid pulling or levering the bit sideways after breakthrough. Let it finish the circular cut, stop the drill, and remove the tool carefully. Be aware that the stone core may release suddenly.
9. Clean and inspect the opening before test-fitting the faucet
Remove the stone core, slurry, tape, and loose particles. Inspect the opening for cracks extending beyond the cut, significant chips, or an irregular diameter.
Test-fit the faucet without forcing it. Confirm that:
-
The stem passes through freely.
-
The base covers the opening.
-
The gasket rests flat.
-
The lower washer or bracket contacts a suitable surface.
-
The retaining nut can be threaded correctly.
-
The tubing can follow a smooth route.
Stop if you see a new crack or if the faucet requires force to enter the hole.
10. Mount the faucet without overtightening its hardware
Assemble the gasket, washers, bracket, and nut in the order shown in the faucet manual. Hold the faucet in its final orientation while tightening from below.
The hardware should secure the faucet without crushing the gasket or placing unnecessary stress on the stone. Overtightening does not correct an oversized or uneven hole and can damage components or contribute to countertop stress.
How to reduce cracking, chipping, and drilling errors
Never use hammer action or force a dull or unsuitable bit through granite
The most important preventive measures are straightforward:
-
Use a diamond bit intended for granite.
-
Switch off hammer or percussion action.
-
Stabilize the bit before making a full cut.
-
Drill slowly with controlled pressure.
-
Keep a wet-cutting bit cooled.
-
Avoid seams, cracks, damaged stone, and restricted margins.
-
Stop when the tool behaves unexpectedly.
A worn, glazed, damaged, or incompatible hole saw can overheat or stop cutting. Do not compensate by pushing harder.
Stop if the granite vibrates, the bit binds, or an existing crack begins to change
Release the trigger immediately if:
-
The countertop begins vibrating noticeably.
-
The drill pulls or twists unexpectedly.
-
The bit becomes stuck.
-
Cooling water stops reaching the cut.
-
The drilling sound changes abruptly.
-
A crack appears or an existing line extends.
-
The tool or bit becomes unusually hot.
Disconnect power before inspecting or clearing the bit. A countertop professional should evaluate any expanding crack or structural concern before drilling resumes.
What to do if the diamond hole saw wanders before the groove is established
Stop before the bit creates a long surface scratch. Do not keep chasing the center mark with a spinning bit.
Clean the area, inspect the shallow marks, and reposition a secure drilling guide. Confirm that the final faucet base will cover any superficial mark. If the bit has already cut outside the area the base can cover, consult a professional before enlarging or relocating the hole.
What to do if drilling progress stops or the bit overheats
Stop drilling and allow the assembly to cool safely. Check for:
-
Insufficient cooling water
-
Slurry packed inside the cut
-
A dull or glazed diamond surface
-
Excessive drill speed
-
Too much pressure
-
Incorrect bit rotation or tool setup
-
Contact with unexpected material below the granite
Do not touch a hot bit with bare hands. Do not resume by increasing speed or pressure without identifying the cause.
What to do if the finished hole has minor edge chips
Clean the opening and inspect it under good lighting. If the chips are shallow, do not extend beyond the faucet base, and do not involve a spreading crack, the gasket and base may still cover them.
Do not grind or fill the area automatically. Any edge treatment or sealant must be compatible with the countertop and permitted by the faucet and stone-care instructions. Deep chips, cracks, or missing support under the mounting hardware require professional evaluation.
What to do if the hole is too small, too large, or slightly misaligned
|
Problem |
Safer next step |
What to avoid
|
|---|---|---|
|
Hole is slightly too small |
Recheck the manual and use the correctly sized diamond tool or ask a fabricator to enlarge it |
Forcing the faucet through or grinding randomly |
|
Hole is substantially too small |
Have a countertop professional assess enlargement, especially when the existing opening cannot guide a larger core bit |
Freehand drilling without a stable guide |
|
Hole is too large |
Check whether the approved gasket, base, washer, and nut can still cover and support the opening |
Assuming a wider decorative base alone fixes inadequate support |
|
Hole is slightly misaligned |
Verify top coverage, lower hardware access, faucet orientation, and tubing clearance |
Angling or forcing the mounting stem |
|
Hole exposes a crack or major chip |
Stop and contact a countertop professional |
Tightening the faucet over damaged stone |
A larger escutcheon may hide an opening cosmetically, but it does not automatically restore structural support. Use only components compatible with the faucet’s mounting system.
What to check if the installed RO faucet wobbles or does not sit flush
A loose or tilted faucet may result from:
-
An oversized or irregular opening
-
A gasket caught partly inside the hole
-
Incorrect washer or bracket order
-
A retaining nut that is cross-threaded or insufficiently engaged
-
Cabinet material or sink hardware blocking the lower bracket
-
Tubing pulling sideways on the faucet
-
Debris trapped beneath the base
-
An uneven or chipped mounting surface
Disassemble and inspect the installation instead of tightening the nut more aggressively. If the hole is too large for the specified hardware to support the faucet, contact the faucet supplier or a qualified installer.
Who should install RO faucet on granite — and when should you avoid it?
DIY may be reasonable when the granite is sound, the location is clear, and the correct tools are available
DIY drilling may be a reasonable option when all of the following are true:
-
The granite has no visible crack or damage near the proposed opening.
-
The location is clear from above and below.
-
The countertop fabricator permits the modification.
-
The faucet manual gives an exact hole specification.
-
You have the correctly sized diamond core bit.
-
You can use a variable-speed drill without hammer action.
-
You can stabilize the bit and manage cooling water safely.
-
You are comfortable maintaining light pressure and accurate alignment.
-
You accept the possibility that accidental damage may not be covered.
Being comfortable with ordinary household drilling does not necessarily mean you are prepared to wet-drill polished stone. If any part of the process is uncertain, hiring a professional for the countertop opening is the lower-risk choice.
Hire a countertop professional for cracks, seams, narrow margins, unknown reinforcement, or warranty concerns
Professional drilling is advisable when the proposed location involves:
-
A seam, repaired section, crack, or existing chip
-
A narrow area between the sink cutout and another edge
-
An undermount sink rim that is difficult to locate
-
Unknown reinforcement or countertop construction
-
An expensive or difficult-to-replace slab
-
A countertop warranty requiring authorized work
-
An existing hole that must be enlarged
-
A large hole with little margin for placement error
-
No practical way to control slurry and electrical exposure
-
Uncertainty about the condition or type of stone
You can also split the project between trades: have a countertop fabricator verify the location and drill the granite, then complete the faucet and filtration-system plumbing yourself or hire a qualified installer. Before scheduling either service, confirm who is responsible for the stone opening, faucet mounting, tubing, drain connections, and final leak testing.
A countertop fabricator is usually the most relevant professional for assessing and drilling granite. A plumber or water-filter installer may handle the faucet and tubing but may not perform stone fabrication. Confirm the scope before scheduling the work.
Cost vs effort table: existing hole, DIY RO faucet mounting, or professional drilling
|
Installation path |
Fit checks |
Tools required |
Countertop risk |
Effort |
Best-use conditions
|
|---|---|---|---|---|---|
|
Reuse an existing accessory hole |
Diameter, base coverage, nut clearance, tubing route |
Measuring tools and normal faucet-installation tools |
Lowest because no new stone cut is required |
Low to moderate |
Existing hole matches the faucet and has clear access below |
|
DIY granite drilling and faucet mounting |
All faucet dimensions, stone condition, warranty, upper and lower clearance |
Diamond core bit, variable-speed drill, guide, cooling setup, protective equipment |
Higher because mistakes can chip or crack granite |
High |
Sound granite, clear location, correct tools, and confident tool control |
|
Professional granite drilling, DIY plumbing |
Exact faucet hole specification and drilling location |
Faucet-installation and plumbing tools after the opening is made |
Lower for the homeowner, although stone work always has some risk |
Moderate |
Homeowner is comfortable with plumbing but not stone drilling |
|
Professional drilling and installation |
Product fit, cabinet space, service scope |
Generally supplied by the relevant professionals |
Transfers execution to experienced installers; guarantees depend on provider terms |
Lowest homeowner effort |
Complex layouts, warranty concerns, difficult stone conditions, or limited DIY experience |
Do not choose based on effort alone. The condition and replaceability of the granite should carry more weight than the convenience of completing the project without outside help.
Completing the water filter faucet installation after drilling

Confirm that the faucet base covers the opening and the gasket sits flat
After cleaning the granite, position the gasket and faucet base exactly as the manual shows. The gasket should sit on the countertop rather than sagging into the opening.
Verify the spout direction before fully tightening the lower nut. Tighten gradually while keeping the faucet centered and level. Do not use an unapproved sealant as a substitute for the supplied gasket or correct hole sizing.
Route the filtered-water tubing without kinks, sharp bends, or strain on fittings
Plan a smooth path from the filtration system to the faucet. Tubing should not be pinched behind the sink, stretched across a sharp cabinet edge, or pulled tight against the faucet stem.
Keep it clear of:
-
Disposal components
-
Hot water lines
-
Drawer slides
-
Hinges and stored items
-
Sharp fasteners or unfinished cabinet edges
-
Plumbing parts that move during maintenance
Leave enough accessible tubing to make connections according to the system manual without creating loose coils that can snag other components.
Account for additional tubing when the specified RO faucet uses an air-gap design
Some RO systems use an air-gap faucet, which may require additional drain-related tubing through or below the faucet opening. Others use a non-air-gap drinking-water faucet with a simpler filtered-water connection.
Do not assume the two designs have identical hole or clearance requirements. Follow the system instructions for:
-
The number of lines passing through the opening
-
Tubing diameter and routing
-
Drain connection placement
-
Required loops or alignment
-
Connection sequence
The countertop hole should never be sized by the water-supply tube alone.
Follow the filter or RO system manual for connections, flushing, and leak checks
Once the faucet is mounted:
-
Connect tubing in the order specified by the system manufacturer.
-
Make sure each line is fully seated and secured as directed.
-
Open the water supply according to the installation procedure.
-
Inspect every fitting and valve for leaks.
-
Flush the system for the required procedure stated in its manual.
-
Recheck the faucet mount and all connections after the system has operated.
Hole size does not determine water pressure or filtration performance. Its purpose is to provide a secure, correctly aligned mounting point without stressing the faucet or tubing.
Before choosing a faucet, compare its required opening, countertop-thickness allowance, hardware, and tubing arrangement with available filtered water faucet options.
If granite drilling and under-sink installation are not practical, a faucet-mounted water filter may offer an alternative that does not require a separate countertop opening. Compatibility still depends on the existing kitchen faucet and the product instructions.
Granite countertop RO faucet FAQs
Can I install an RO faucet without a pre-drilled hole?
Yes. If there is no suitable existing accessory opening, a new hole can be drilled in granite with a correctly sized diamond core bit. Use the exact diameter stated in the faucet manual, switch off hammer action, drill slowly with light pressure, and maintain the cooling required by the bit manufacturer.
Hire a countertop professional if the stone has cracks, seams, narrow margins, unknown reinforcement, or warranty restrictions.
Can an existing soap-dispenser or accessory hole be used for a water filter faucet?
Often, but only when the diameter, location, base coverage, countertop thickness, and lower mounting clearance are compatible with the faucet. Confirm that the retaining nut can sit flat and that the tubing can be routed without kinking. Never force a mounting stem through an undersized opening.
Will drilling a faucet hole affect the granite countertop warranty?
It may. Warranty terms are set by the countertop manufacturer, fabricator, or installer. Homeowner modifications and accidental drilling damage may be excluded, while some warranties may require an authorized professional to perform the work. Review the terms and contact the fabricator before drilling.
What type of drill bit should be used for a granite countertop?
Use a correctly sized diamond core bit or diamond-tipped hole saw intended for granite or natural stone. Operate it with a variable-speed drill at low speed, with hammer or percussion mode switched off. Follow the bit manufacturer’s cooling instructions.
How do you reduce the risk of cracking granite while drilling?
Inspect the granite first, avoid questionable seams and damaged areas, stabilize the bit, use low speed and light pressure, and keep a wet-cutting diamond bit cool. Reduce pressure near breakthrough and stop immediately if the stone vibrates, the bit binds, or a crack changes.
Installing an RO faucet on granite is feasible, but the drilling decision should come after the fit checks—not before them. Confirm the exact faucet hole size, inspect both sides of the countertop, and use granite-specific tools and controlled technique. When the stone condition, location, or warranty creates uncertainty, let a countertop professional make the opening and complete the faucet installation only after the granite has been inspected.
Reference
https://www.cdc.gov/niosh/publications/numbered/2026-101.html