


You can add an inline water filter to a refrigerator by installing it in the cold-water supply line that feeds the dispenser and ice maker. In many North American kitchens, that means connecting an external filter to a 1/4-inch outside-diameter, or OD, tube.
The plumbing is usually straightforward, but a successful installation depends on more than cutting the line and attaching two fittings. The filter must match the tubing and available water pressure, point in the correct flow direction, remain accessible for replacement, and be flushed according to its manufacturer’s instructions. Poorly sized adapters, sharp tubing bends, dual filters, and incomplete flushing can lead to slow dispensing, leaks, black carbon particles, or unusual taste.
This guide explains how to add an inline water filter to a refrigerator, flush it correctly, and preserve normal dispenser and ice-maker performance.
Can You Add an External Water Filter to a Refrigerator?
Yes, you can add an external refrigerator water filter when the appliance receives water through a compatible cold-water line. The filter is installed upstream of the refrigerator so that water passes through the filter before reaching the dispenser and ice maker.
An inline filter can be a practical upgrade when:
-
The refrigerator does not have a built-in filter.
-
You want a filter that is easier to access or replace.
-
An under-sink filtration system will supply both the kitchen faucet and refrigerator.
-
The existing refrigerator line can accept the required filter fittings or adapters.
-
There is enough space to mount the filter without pinching the tubing.
Whether you need a direct inline refrigerator filter, an under-sink reverse osmosis system, or replacement filters for ongoing maintenance, compare these Frizzlife options based on your plumbing setup and filtration needs.

A direct inline filtration option to explore for refrigerator and ice-maker water-line setups. Confirm tubing, fitting, pressure, and installation requirements before use.
View MS99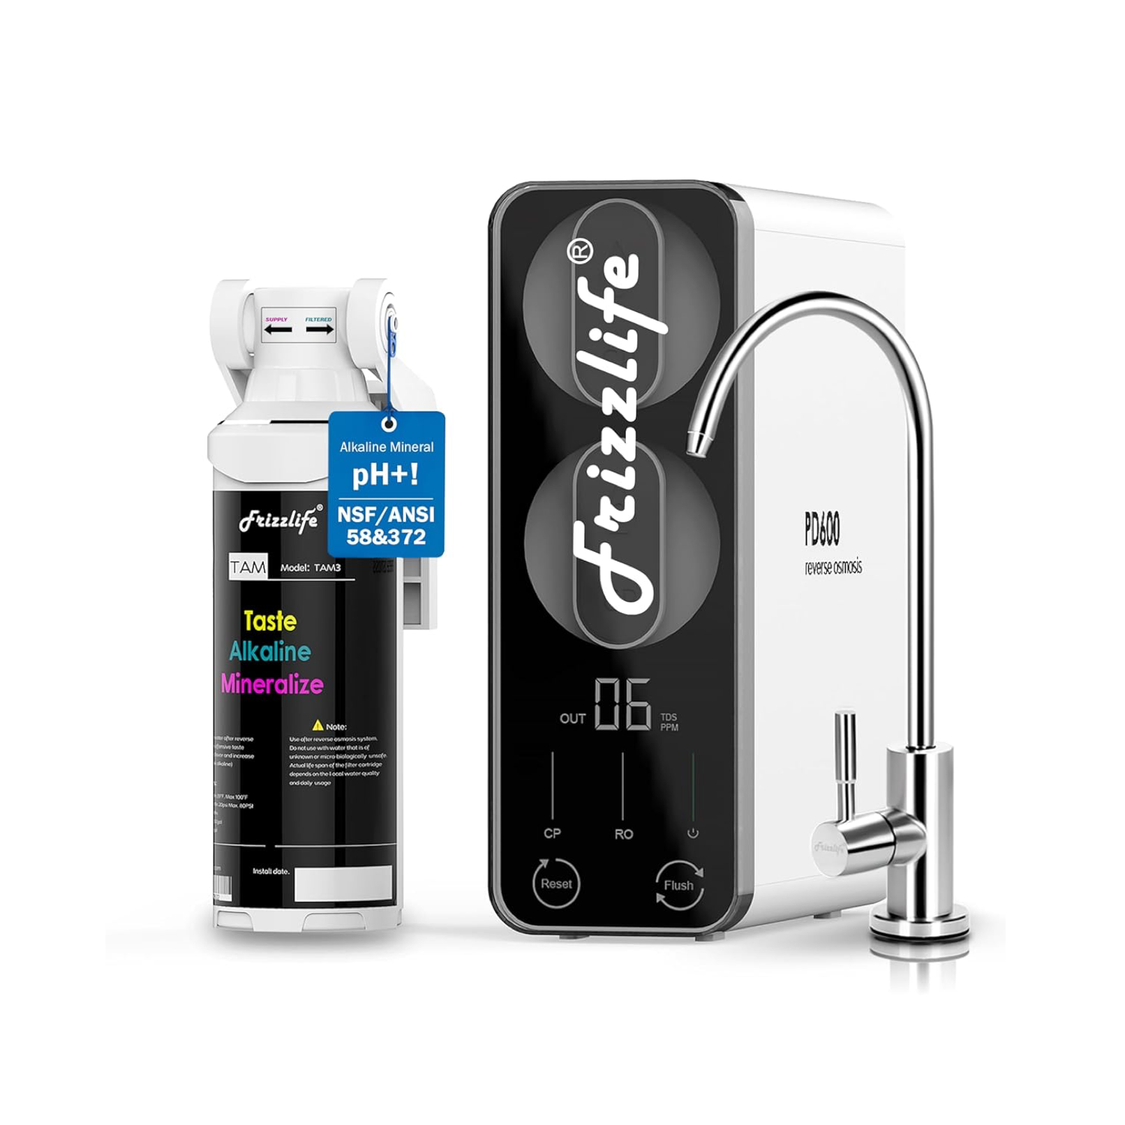
Explore an under-sink reverse osmosis option when planning a broader kitchen filtration setup. Confirm the required refrigerator or ice-maker connection arrangement for your installation.
View PD600-TAM3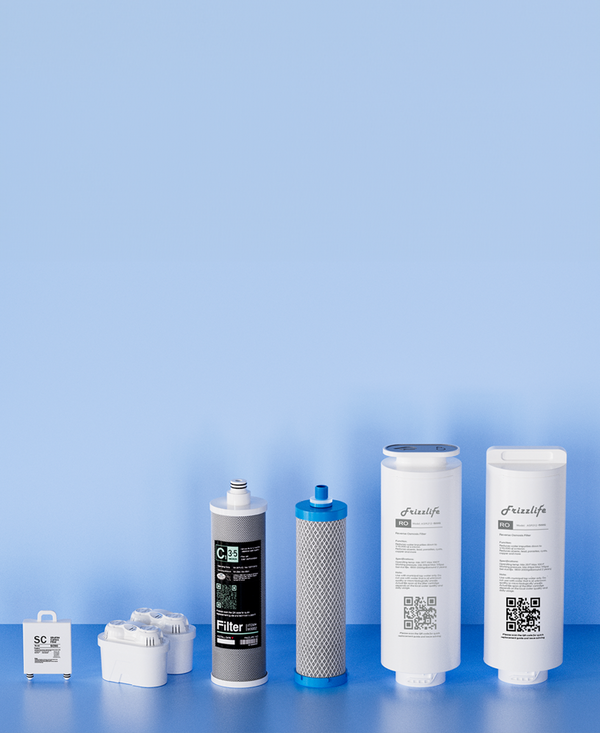
Find the appropriate Frizzlife replacement filter when routine maintenance is due. Check your exact system model and filter compatibility before ordering.
Find Replacement FiltersHow an external filter supplies the dispenser and ice maker
A typical refrigerator connection follows this path:
Cold-water supply → shut-off valve → external inline filter → refrigerator inlet → dispenser and ice maker
The filter has an inlet and an outlet. An arrow or “IN/OUT” marking on the housing shows the required flow direction. The inlet connects to the household water-supply side, while the outlet connects to the refrigerator side.
If the filter is installed backward, water may flow slowly or not at all, and the filter may not operate as intended.

External inline filters versus built-in refrigerator filters
A built-in filter fits inside the refrigerator and is designed for a specific appliance housing. An external inline filter sits outside the refrigerator and connects directly to the incoming water line.
The main differences are location, connection method, and replacement procedure. An external filter may be mounted behind the refrigerator, inside an adjacent cabinet, or near the cold-water shut-off. It does not need to match an internal cartridge housing, but it does need to match the plumbing configuration.
Some refrigerators can operate with both an internal and external filter. However, two filters in series create more resistance than one. If dispenser flow or ice production becomes noticeably slower, consult the refrigerator manual to determine whether a manufacturer-approved bypass plug can be used for the internal filter. Not every appliance supports a bypass, and an improvised bypass should never be used.
When an inline filter may be a poor fit
An inline filter may not be the right DIY project when:
-
The supply pressure is already too low for the refrigerator.
-
The existing valve is corroded, damaged, or does not close completely.
-
The line is an unfamiliar size or uses incompatible proprietary hardware.
-
A braided hose cannot accept the filter without threaded adapters.
-
There is no safe, accessible mounting location.
-
The tubing path would require tight bends or expose the line to heat or damage.
-
The refrigerator or filter instructions prohibit the intended configuration.
-
Local plumbing rules require work by a licensed professional.
Key takeaway: Before installation, confirm the cold-water source, tubing size and material, fitting types, filter operating requirements, flow direction, and mounting space.
Check Whether an Inline Filter Will Work With Your Setup
A compatibility check can prevent most leaks and low-flow complaints.
Confirm a cold-water connection
Refrigerator filters are intended for cold-water service unless their documentation explicitly states otherwise. Trace the refrigerator line to its shut-off valve and verify that it connects to a cold-water source.
Do not connect a standard refrigerator inline filter to a hot-water line. Heat may damage the filter media, housing, seals, or tubing.
Identify the water-line material
Refrigerator supply lines commonly use one of three materials:

|
Line material |
What to know before installation |
|
Plastic tubing |
Often compatible with push-to-connect or compression fittings when the tubing size and material are approved by the filter manufacturer. |
|
Copper tubing |
Commonly uses compression fittings. Avoid flattening, bending, or scoring the tube. |
|
Braided stainless steel hose |
Do not cut the hose. Disconnect it at a threaded connection and use compatible adapters or a purpose-made connection kit. |
Replace tubing that is brittle, cracked, flattened, heavily corroded, or otherwise damaged rather than building a new filter installation around it.
Verify whether the line is 1/4-inch OD
Many refrigerator and ice-maker installations use 1/4-inch OD tubing, but visual estimation is not enough. “1/4 inch” normally refers to the tubing’s outside diameter in this application, not its inside diameter.
Check the appliance manual, tubing markings, existing fittings, or measure the tube accurately. If the filter ports and supply line are different sizes, use approved adapters designed for potable-water plumbing. A fitting that technically connects two parts but narrows the water path unnecessarily can create a flow bottleneck.
Match the fitting type
An inline filter installation may involve:
-
Push-to-connect fittings: The tube is inserted to a specified depth and retained by an internal collet.
-
Compression fittings: A nut and compression component create a seal around the tubing.
-
Threaded fittings: A threaded adapter connects the filter, valve, or braided hose.
-
Combination adapters: These transition between tubing and threaded connections.
Do not combine components simply because their threads appear to fit. Thread standards, sealing surfaces, and connection methods vary. Use the fittings listed in the filter instructions.
Apply PTFE thread-sealing tape only where the manufacturer directs. Tape is generally used on compatible tapered pipe threads, not on compression sealing surfaces or push-fit tubing.
Choose the installation location
The best location protects the tubing and keeps the filter accessible.
Behind the refrigerator
This creates a short, direct connection, but space may be limited. The filter must not prevent the appliance from sitting correctly or become trapped between the refrigerator and wall.
Leave enough tubing for the refrigerator to be pulled out without stretching the connections.
On a nearby wall or inside an adjacent cabinet
A wall or cabinet location often makes filter changes easier. Secure the filter with its specified clips or bracket and protect the tubing where it passes through cabinet panels. Any opening should be smooth or fitted with a protective sleeve so an edge cannot cut the line.
Under the sink or near the shut-off valve
Installing near the water source can make shut-off access and flushing easier. This location is especially relevant when an under-sink system supplies the refrigerator through an ice-maker connection kit.
A longer run to the refrigerator can add resistance, so plan a direct tubing route and avoid unnecessary coils. Frizzlife offers several refrigerator and ice-maker filtration configurations, including options intended for direct inline use and connection arrangements for compatible under-sink systems. Confirm the requirements of the specific system and refrigerator before ordering parts.
Allow room for bends and future replacement
Do not mount the filter so tightly that the tubing must make a sharp turn at either fitting. Gentle curves reduce stress and help preserve flow. There should also be enough room to remove the old filter, flush a replacement, and reconnect the line without dismantling cabinetry.
Check pressure and the full filtration path
Review the inline filter’s operating-pressure and flow specifications, then compare them with the refrigerator’s requirements and the available household supply. Filter media, fittings, tubing length, and other filtration stages can all affect dispenser flow and ice-maker fill time.
If the refrigerator already has an internal filter, check the appliance manual before adding an external one. Keeping both filters may increase restriction; use an internal bypass only when the refrigerator manufacturer provides or approves one.
For an under-sink carbon or reverse osmosis connection, confirm that the specific system supports refrigerator service and use its specified tee, tubing, and ice-maker connection kit. Long tubing runs and multiple fittings can further reduce flow. Call a plumber if the adapters are unclear, the valve requires replacement, tubing must pass through walls or floors, or local plumbing requirements are uncertain.
Tools, Parts, and Safety Preparation
Gather all components before shutting off the water.
Installation checklist for a 1/4-inch inline filter
Depending on the filter and existing plumbing, you may need:
-
An inline filter with compatible inlet and outlet fittings
-
Approved 1/4-inch OD tubing, if additional length is required
-
A tubing cutter suitable for the line material
-
Correct push-fit, compression, or threaded adapters
-
Compression nuts, inserts, or ferrules when specified
-
Mounting clips, bracket, screws, and suitable anchors
-
A bucket and absorbent towels
-
Wrenches sized for the fittings
-
PTFE thread-sealing tape when specifically required
-
A marker and measuring tape
-
A flashlight
-
Leak-detection paper or dry paper towels
Do not use an ordinary cutting tool that crushes plastic or copper tubing. A square, undamaged tube end is essential for a reliable seal.
Shut down and depressurize the line
-
Unplug the refrigerator before working behind it.
-
Close the cold-water shut-off valve completely.
-
Operate the water dispenser until the flow stops or substantially subsides.
-
Place towels and a bucket below the planned disconnection point.
-
Inspect the valve, fittings, and tubing before making a cut.
Some water will remain in the line even after depressurization.
If the valve leaks while closed, will not turn, or shows significant corrosion, stop the installation. A failed shut-off valve should be repaired before the line is opened.
Mark the location and flow direction
Hold the filter in its intended position and verify:
-
The inlet faces the water supply.
-
The outlet faces the refrigerator.
-
The line can reach both ports without tension.
-
Tubing curves will remain gentle.
-
The filter can be removed later.
-
Mounting screws will not contact wiring or hidden plumbing.
Do not rely on the filter’s physical shape to determine direction. Find the arrow or inlet/outlet labels before cutting anything.
How to Add an Inline Water Filter to a Refrigerator
These steps describe a typical inline filter installation for an existing refrigerator line. The filter manual takes priority whenever its instructions differ.
Step 1: Pull out the refrigerator carefully
Move the refrigerator slowly so the existing water line and power cord are not stretched, pinched, or pulled from their connections. If the line is too short to move the appliance safely, access the connection from another location or arrange for the line to be extended correctly.
Step 2: Choose an accessible section of the line
Select a straight section with enough room for the filter body, fittings, and tubing bends. Avoid placing the filter directly on the floor where it may be struck, exposed to cleaning water, or crushed by the appliance.
Step 3: Cut or disconnect the tubing
The correct method depends on the line material.
Plastic tubing
Use an approved tubing cutter to make a clean, square cut. Inspect the end for scratches, burrs, flattening, or an angled edge. Recut it if necessary.
Push-to-connect fittings seal against the outside surface of the tube, so a damaged end can leak even when it appears fully inserted.
Copper tubing
Use a suitable tube cutter without crushing the copper. Remove burrs as directed for the fitting, and make sure the tube remains round. Avoid repeated bending near the connection because work-hardened copper can crack.
Braided stainless steel hose
Do not cut a braided hose. Disconnect it at its threaded end and install the filter using the correct threaded-to-tubing adapters or a compatible connection assembly. If the thread type cannot be positively identified, consult a plumber.
Step 4: Connect the supply side to the filter inlet
Attach the tube or adapter coming from the cold-water valve to the filter inlet.
For a push-to-connect fitting:
-
Mark the manufacturer-specified insertion depth on the tubing.
-
Push the tube straight into the fitting until it reaches the internal stop.
-
Confirm that the depth mark is at the fitting edge.
-
Perform a gentle tug test.
For a compression fitting:
-
Install the nut, sleeve, insert, or ferrule in the order shown in the instructions.
-
Keep the tube fully seated and aligned.
-
Tighten as directed while supporting the fitting body with a second wrench when necessary.
-
Do not overtighten, which may deform the tubing or damage the fitting.
For a threaded adapter, apply thread sealant only when specified and keep sealing material out of the water path.
Step 5: Verify the flow arrow
Before connecting the outlet, check again that the arrow points toward the refrigerator. This simple check can prevent a complete disassembly later.
Step 6: Prepare for a bucket flush
Place the filter outlet tube in a bucket. Secure it so water pressure cannot whip the tubing out of the container. If the filter instructions require an outlet fitting or temporary flushing tube, install it now.
Whenever practical, flush before connecting the outlet to the refrigerator. This keeps initial carbon fines and loose particles from entering the appliance’s internal tubing.
Step 7: Mount the filter
Install the supplied clips or bracket on a stable surface. Support the filter body without forcing either connection sideways.
Some filters have a required mounting orientation. Follow the model-specific instructions rather than assuming vertical or horizontal mounting is interchangeable.
Step 8: Restore water slowly
Open the shut-off valve gradually. Watch the inlet fitting as the filter fills and air begins leaving the outlet. If the inlet leaks, close the valve immediately, depressurize the line, and correct the connection.
Do not try to repair an active leak by tightening or reseating a pressurized fitting.
Step 9: Flush the filter into the bucket

Flush for the volume or time stated in the filter manual. The initial water may contain air, appear temporarily cloudy, or show fine black carbon particles. Continue until the manufacturer’s flushing requirement is met.
Step 10: Connect the outlet to the refrigerator
Turn off the water again and relieve pressure. Connect the filter outlet to the refrigerator-side line using the approved fitting method. Fully seat the tubing and perform a gentle tug test.
Step 11: Check for immediate and delayed leaks
Slowly reopen the valve and inspect every connection. Dry the fittings completely, then hold a clean paper towel around each joint. Moisture on the paper can reveal a slow seep that is difficult to see.
Check again after several minutes, after operating the dispenser, and during the first 24 hours.
Step 12: Restore power and move the refrigerator back
Plug in the refrigerator and confirm that the dispenser and ice maker are enabled. Push the appliance back slowly while watching the tubing. Maintain a gentle service loop, but do not leave a tight coil that can fold over or become trapped.
Stop if the filter, line, or fittings contact the wall in a way that creates stress.
How Long Should You Flush a New Inline Filter?
There is no universal flush time for every inline refrigerator filter. Manufacturer instructions commonly use either a specified volume or a specified number of minutes. Depending on the model, directions may call for approximately 2–5 gallons, 5–10 minutes, or flushing until the water runs clear.
Always follow the instructions for the exact filter being installed.
Why flushing matters
A new carbon-based filter may release fine carbon particles during its first use. Flushing also helps:
-
Remove trapped air
-
Clear loose filter-media particles
-
Reduce initial off-tastes
-
Confirm that water is flowing in the correct direction
-
Reveal connection leaks before the refrigerator is returned to place
Small black specks during the initial flush are often carbon fines rather than a sign that the filter housing has failed. They should diminish as flushing continues.
Bucket flush before refrigerator connection
The preferred method, when allowed by the filter instructions, is to direct the outlet into a bucket before connecting it to the refrigerator. This avoids sending most initial particles through the refrigerator’s valves and internal water path.
Open the water slowly, keep the outlet secure, and flush continuously or in the manner specified by the manufacturer.
The initial flush is generally complete when:
-
The specified time or volume has been reached.
-
Water runs clear.
-
Visible black particles have stopped.
-
Sputtering has largely subsided.
-
No unusual manufacturing taste remains after the required flush.
Clear water alone does not replace a specified flush volume or time. If the manual requires a particular amount, complete it even if the water looks clear sooner.
Post-connection flushing
After connecting the outlet, run water through the dispenser according to the refrigerator and filter instructions. Dispense in reasonable intervals if the appliance manual warns against continuous operation.
The ice maker may retain water that entered during installation. Discard the first batches of ice when required by the appliance or filter documentation.
If cloudy water clears from the bottom upward after sitting briefly, trapped air may be the cause. Continue flushing. If black particles, unusual taste, odor, or cloudiness persist beyond the specified procedure, stop using the water and recheck the filter orientation and installation instructions. Contact the filter manufacturer if the issue continues.
How to Prevent an Inline Water Filter From Reducing Refrigerator Pressure
An inline filter does not create water pressure. It uses the available supply pressure to move water through its media, and that process adds resistance. The goal is to avoid unnecessary restriction around the filter.
Pressure versus dispenser flow
Household water pressure and dispenser flow rate are related but not identical.
-
Pressure is the force available in the supply line.
-
Flow rate is how quickly water reaches the glass or ice maker.
A home may have acceptable static pressure while a restrictive filter, narrow adapter, long tubing run, or partially closed valve limits actual flow. Users often describe this as “low pressure,” even when the noticeable symptom is slow flow at the dispenser.
Choose a filter for the plumbing conditions
Before installation, compare the filter’s operating-pressure and flow specifications with the refrigerator’s requirements and the available supply. Do not infer performance from port size alone. Two filters with 1/4-inch connections can create different levels of resistance.
Keep tubing short and direct

Use the shortest practical route while preserving enough slack to service the appliance. Long runs, unnecessary coils, and repeated fittings add resistance.
Use gentle bends rather than sharp turns. A plastic line can look open from the outside while being partially collapsed at a bend.
Protect the line when moving the refrigerator
One of the most common post-installation problems is tubing pinched between the appliance and wall. Observe the line as the refrigerator moves back. Mount the filter high enough and far enough to avoid wheels, compressor components, sharp cabinet edges, and hot surfaces.
Eliminate avoidable bottlenecks
Check that:
-
The shut-off valve is fully open.
-
Adapters preserve a suitable internal water path.
-
Tubing has not been crushed by a compression fitting.
-
Push-fit tubing has reached the internal stop.
-
The filter arrow points toward the refrigerator.
-
There are no unnecessary filters in series.
-
The installed filter is not overdue for replacement.
Consider the effect of multiple filters
A whole-house system, under-sink system, external refrigerator filter, and internal refrigerator cartridge may all contribute resistance. More filtration stages do not automatically produce a suitable refrigerator setup.
If flow drops after adding an external filter, evaluate the entire path rather than assuming the newest component is defective. Check the appliance manual for an approved internal-filter bypass and use it diagnostically only as directed.
Plan under-sink and RO connections carefully
A refrigerator supplied from an under-sink system may have a much longer tubing run than one connected to a valve directly behind the appliance. Route the line efficiently and use the connection kit specified for the system.
Reverse osmosis output, storage design, and pressure behavior vary by model. Confirm that the particular system supports refrigerator and ice-maker service before connecting it. Avoid universal claims that an RO system will either always work or always cause low flow.
Troubleshooting Low Flow, Leaks, and Other Problems
If the dispenser slows down after installation, work through the supply path in a logical order.
Inline water filter low-pressure diagnostic checklist
-
Confirm the shut-off valve is fully open. A partially closed or failing valve can limit flow.
-
Inspect the entire line. Look behind the refrigerator, inside cabinets, and near mounting clips for kinks or pinches.
-
Verify flow direction. The arrow must point toward the refrigerator.
-
Check tubing insertion. Push-fit tubing must reach the specified depth.
-
Inspect adapters. Confirm the correct size and connection type.
-
Flush additional air. Trapped air can cause sputtering and intermittent flow.
-
Check the internal refrigerator filter. An old cartridge may already be restricting the appliance.
-
Confirm the external filter is appropriate and new. A clogged, damaged, or incorrect filter may require replacement.
-
Compare flow carefully. If permitted by the instructions, isolate or bypass one filtration stage at a time to identify the restriction.
Use only a manufacturer-approved refrigerator bypass plug. Never operate the appliance with an improvised object in the internal filter housing.
No water reaches the dispenser
If there is no flow:
-
Make sure the water supply has been restored.
-
Check for a second closed valve.
-
Confirm the line was not folded when the refrigerator was moved.
-
Verify that inlet and outlet connections are not reversed.
-
Confirm the filter’s protective shipping caps were removed where required.
-
Check whether the refrigerator’s control lock or dispenser setting is active.
-
Allow time for the empty filter and line to fill.
-
Inspect the refrigerator inlet connection.
If water reaches the filter outlet during a controlled bucket test but not the dispenser, the restriction may be inside the appliance. Follow the refrigerator’s service guidance.
The ice maker fills slowly
A slow ice maker may indicate reduced supply flow even if the dispenser still works. Check the same valves, bends, filters, and adapters used for low-flow troubleshooting. Also allow the refrigerator to complete its normal cooling and ice-making cycle after it has been unplugged.
Do not adjust appliance fill controls unless the refrigerator manual provides a specific procedure.
Leaking push-to-connect fitting
Shut off the water and depressurize the line. Release the tubing according to the fitting instructions, then inspect it.
A reliable reconnection may require:
-
Cutting off a scratched or distorted section
-
Making a new square cut
-
Removing burrs
-
Reinserting the tube to the full specified depth
-
Replacing a damaged fitting
Do not add thread tape, adhesive, or sealant around push-fit tubing.
Leaking compression or threaded fitting
For a compression leak, verify that the tubing is round, aligned, and assembled with the correct components. Tighten only as directed. Overtightening can worsen the leak by deforming the tube or sealing component.
For a threaded leak, confirm that the adapter uses the correct thread type and that sealant was applied only where specified. Shut off and depressurize the system before disassembly.
Sputtering, cloudy water, or hammering
Sputtering is common while trapped air leaves a newly opened line. It should decrease with flushing. Cloudiness may also result from tiny air bubbles.
Hammering or repeated knocking can occur when air moves through the line or a valve closes abruptly. Continue the specified flush and check that the tubing is secured without being rigidly stressed. Persistent noise, violent movement, or pressure surges should be evaluated by a plumber.
When to call a licensed plumber
Stop and seek professional help if:
-
The shut-off valve leaks or will not close.
-
Water appears near electrical components.
-
A fitting repeatedly leaks after correct reassembly.
-
The tubing size or thread type cannot be identified.
-
Copper tubing is severely bent, corroded, or inaccessible.
-
Plumbing must pass through walls, floors, or structural areas.
-
Supply pressure appears unstable.
-
Local codes or appliance instructions require professional installation.
If a leak cannot be controlled, close the main water supply.
Replacement, Leak Monitoring, and Long-Term Fit
A good installation remains serviceable after the refrigerator is back in place.
Recheck every fitting after several minutes, after dispensing water, and periodically during the first 24 hours. A slow compression or threaded leak may take time to become visible.
Record the filter’s installation date and follow the model-specific replacement schedule. Do not assume a universal six-month or annual interval; capacity and replacement guidance vary. Replace the filter when required by its instructions or when persistent flow or taste changes indicate that service may be needed.
For every replacement:
-
Unplug or safely access the refrigerator as directed.
-
Shut off the water.
-
Depressurize the line.
-
Remove the old filter without twisting the plumbing.
-
Inspect the valve, tubing, adapters, and mounting hardware.
-
Install the new filter in the correct direction.
-
Flush it for its specified time or volume.
-
Reconnect the refrigerator.
-
Restore water slowly and check for leaks.
If dispenser flow gradually declines, do not automatically install a larger number of filtration stages. Reassess whether the external and internal filters both need to remain in service.
Final installation checklist
Before considering the job complete, confirm that:
-
The filter is connected to cold water.
-
The tubing size has been verified as 1/4-inch OD or adapted correctly.
-
Plastic, copper, or braided line connections use the proper fitting type.
-
The filter arrow points toward the refrigerator.
-
The filter is mounted securely and remains accessible.
-
Tubing follows gentle bends without kinks or pinch points.
-
The shut-off valve is fully open.
-
The filter was flushed for the manufacturer-specified volume or time.
-
Post-connection flushing is complete.
-
The dispenser operates normally.
-
The ice maker receives water normally.
-
Every connection is dry and leak-free.
-
The installation date has been recorded.
Adding an inline water filter to a refrigerator is manageable when the plumbing is compatible and the installation is planned before the line is cut. Verify the line and fittings, mount the filter where it can be serviced, flush it according to its own manual, and remove avoidable restrictions from the tubing route. Those steps provide the strongest protection against leaks, carbon fines, and disappointing dispenser flow.