


A reverse osmosis system can dispense drinking water through either a 3-way kitchen faucet or a separate RO faucet. Both layouts can work well, but they differ in sink-hole requirements, installation flexibility, air-gap options, appearance, and long-term serviceability.
If you are comparing a 3 way faucet reverse osmosis setup with a dedicated drinking-water spout, the most important question is not simply which faucet looks better. You also need to confirm that the faucet has an isolated filtered-water channel, that its inlet fits the RO outlet tubing, and that the complete installation meets the RO system’s drain and air-gap requirements.
This guide explains how each configuration works and where each one makes the most sense.
Comparison Snapshot: 3-Way Faucet vs. Separate Drinking Water Faucet
A 3-way faucet replaces the main kitchen faucet and handles hot, cold, and RO water through one fixture. A separate drinking water faucet works alongside the existing kitchen faucet and is used only for filtered or RO water.
|
Comparison point |
3-way kitchen faucet |
Separate RO faucet |
|
Water delivered |
Hot, cold, and RO/filtered water |
RO/filtered water only |
|
Main faucet |
Usually replaced |
Usually retained |
|
Sink or countertop holes |
Commonly uses the main faucet hole |
Usually needs an available accessory hole or a newly drilled hole |
|
Internal water path |
Must have a dedicated filtered-water inlet and isolated channel |
Dedicated entirely to drinking water |
|
RO connection |
May require an adapter between the faucet inlet and RO tubing |
Often designed specifically for RO tubing, but specifications still vary |
|
Hot and cold flow |
Operates through the normal mixer pathway |
Unaffected because it remains on the main faucet |
|
RO flow |
Limited by the RO system, tubing, fittings, and filtered channel |
Limited by the RO system, tubing, fittings, and faucet |
|
Air-gap availability |
Built-in RO drain air gaps are uncommon and must be verified |
Air-gap and non-air-gap models are available |
|
Appearance |
One-fixture, minimalist layout |
Two visible fixtures |
|
Future replacement |
Main faucet and RO outlet are combined in one fixture |
Kitchen faucet and RO faucet can be replaced independently |
|
Best fit |
One-hole sinks, clean layouts, and projects where extra drilling is undesirable |
Kitchens keeping an existing faucet, dedicated drinking stations, or installations requiring an air-gap RO faucet |
The short verdict
Choose a 3-in-1 kitchen faucet when you want one fixture, have no convenient second hole, and can verify the filtered inlet, connection size, flow characteristics, and air-gap plan.
Choose a separate drinking water faucet when you want to keep your current kitchen faucet, prefer independent repairs and upgrades, have an available accessory hole, or need an RO faucet with a specific air-gap configuration.
Neither arrangement improves the RO treatment process by itself. Water quality and production capacity are primarily determined by the RO system, while the faucet affects delivery, installation, and day-to-day convenience.
What Is a 3-Way Filtered Water Faucet?
A three way filtered water faucet combines three water supplies in one fixture:
-
Hot tap water
-
Cold tap water
-
Cold filtered or reverse osmosis water
The hot and cold lines function much like those in a standard mixer faucet. The filtered inlet connects to an external under-sink filtration or RO system. A separate handle, lever, button, or other control opens the drinking-water valve, depending on the faucet model.
Most 3-way faucets are delivery fixtures rather than water treatment systems. The faucet does not create RO water unless the product specifically includes separate treatment equipment. An under-sink RO system must still filter the feed water before sending it to the faucet.
Dedicated waterways keep RO water separate
A true kitchen faucet with RO capability uses an isolated internal pathway for the filtered water. Hot and cold tap water pass through the mixer, while RO water bypasses that mixing valve and travels through its own channel.

This separation matters for two reasons:
-
It keeps RO water from intentionally blending with untreated hot or cold water.
-
It allows the regular side of the faucet to maintain normal washing performance while the filtered side operates at the lower flow available from the RO system.
Confirm this design in the faucet specifications. Terms such as “three-function” or “three-mode” do not automatically mean a faucet has three water inlets. A standard pull-down faucet with three spray patterns may have stream, spray, and pause modes while still connecting only to hot and cold water.
For RO use, look for explicit references to:
-
A third filtered-water inlet
-
An isolated drinking-water channel
-
Compatibility with an external under-sink filter or RO system
-
A separate control for filtered water
Can an RO System Connect to a 3-Way Faucet?
Yes, an RO system can connect to a 3-way faucet when the two products are mechanically and functionally compatible. Do not rely only on a general “RO compatible” or “works with all filters” statement. Check the technical details for the exact faucet and RO model.
Four compatibility requirements to check
1. A dedicated filtered-water inlet
The faucet must have a third inlet intended for filtered cold water. A standard hot-and-cold mixer cannot safely be converted into a true 3-way faucet simply by joining RO tubing to one of its supply hoses.
2. An isolated drinking-water channel
Verify that filtered water remains separate inside the faucet. The RO line should bypass the hot-and-cold mixing valve rather than feeding into the regular cold-water pathway.
3. Matching tubing and connector specifications
Many under-sink RO systems use 1/4-inch outside-diameter outlet tubing, but that should not be assumed for every system. Faucet filtered-water inlets may use push-fit connectors, compression fittings, threaded fittings, or a different tube size.
If the faucet and RO outlet do not match, an appropriate reducer or adapter may solve the problem. Before buying one, identify:
-
RO outlet tube outside diameter
-
Faucet inlet size
-
Thread type, if applicable
-
Whether the connection is push-fit, compression, or threaded
-
Whether the faucet includes a suitable adapter
-
Whether the fitting materials are approved for potable-water use
Mixed metric and imperial fittings can create additional confusion. Two connectors that appear similar may have different thread forms or sealing methods.
4. Suitable flow and pressure characteristics
The faucet’s filtered channel must work with the pressure and flow delivered by the RO system. RO water normally flows more slowly than regular tap water because it has passed through the membrane and other filtration stages. Tank pressure, incoming pressure, filter condition, tubing length, fittings, and faucet restrictions can all affect delivery.
A faucet designed only for a higher-flow under-sink carbon filter may not provide the expected experience when connected to a lower-flow RO outlet. Compare the faucet requirements with the RO system manual rather than assuming that all filtered-water faucets behave the same way.
When a 3-way faucet is not a suitable match
A 3-way faucet may be the wrong choice when:
-
It lacks a dedicated filtered-water inlet.
-
Its filtered path is not isolated from the mixer.
-
The required connection cannot be made with an approved fitting.
-
Its operating requirements do not match the RO system.
-
The installation requires a built-in air-gap faucet that the 3-way model does not provide.
-
Replacing the main kitchen faucet would interfere with another sink accessory or mounting constraint.
-
The faucet is marketed for a cartridge filter but does not expressly support RO delivery.
When documentation is unclear, ask the faucet manufacturer for a connection diagram and confirm the RO outlet requirements in the system manual.
Installation Requirements for Each Faucet Setup
Faucet selection changes the sink-deck work, but it does not remove the other parts of an RO installation. You must still plan for the RO unit, water supply connection, outlet tubing, drain connection, and any model-specific equipment.
Installing a 3-way kitchen faucet with RO
A typical installation follows this general sequence:
-
Shut off the hot and cold water supplies.
-
Remove the existing main kitchen faucet.
-
Confirm that the mounting hole and countertop thickness fit the new faucet.
-
Insert the 3-way faucet through the sink or countertop.
-
Install the gasket, washer, mounting bracket, and retaining nut as directed.
-
Connect the hot and cold hoses to their proper supply valves.
-
Connect the filtered-water inlet to the RO outlet tubing using the specified fitting or adapter.
-
Route tubing so it is supported and free of tight bends.
-
Restore the water supply and test each faucet function.
-
Flush the RO system according to its manual and inspect every connection for leaks.
Many 3-way faucets use a single-hole deck mount, but mounting dimensions are model-specific. Published examples commonly center around a standard main-faucet opening, yet required hole diameter and maximum deck thickness vary enough that measurements should always be checked before purchase.
If the existing sink has multiple holes, an escutcheon or deck plate may cover unused openings if the faucet is designed to use one. Verify the plate dimensions rather than assuming it will cover the old layout.
Installing a separate drinking water faucet
A separate RO faucet leaves the main kitchen faucet in place. The installer mounts a smaller drinking-water spout in an accessory hole and connects it to the RO outlet.
This arrangement is often straightforward when the sink already has an unused opening for a soap dispenser, sprayer, or other accessory. Without a spare opening, the installation may require drilling the sink or countertop.
Before drilling, check:
-
The faucet’s required hole diameter
-
Countertop or sink material
-
Deck thickness
-
Clearance for the mounting hardware below
-
Distance from the sink rim and backsplash
-
Reach of the faucet spout over the basin
-
Whether structural supports, clips, or cabinet walls obstruct the chosen location
Drilling stainless steel, composite material, granite, quartz, or another stone surface requires the correct tools and technique. Mistakes can chip, crack, scratch, or permanently alter the surface. Professional installation may be appropriate when the surface is difficult to drill or the countertop warranty imposes restrictions.
Planning the under-sink area
A 3-way faucet saves space above the sink, but it does not necessarily save cabinet space. Both faucet arrangements still need room for the RO equipment and tubing.
Inspect the cabinet for conflicts involving:
-
RO filters and membrane housing
-
A storage tank, if the selected system uses one
-
Garbage disposal
-
Existing drain plumbing
-
Dishwasher hoses
-
Pull-out faucet hose and counterweight
-
Shutoff valves
-
Storage bins or pull-out organizers
-
Tubing service loops needed for maintenance

Keep tubing away from sharp edges, hot surfaces, moving drawers, and the pull-down faucet weight. Avoid tight bends that can restrict flow or place stress on fittings.
If you are still selecting the treatment unit, compare installation layouts and model-specific requirements across Frizzlife reverse osmosis systems before finalizing the faucet and cabinet plan.
Drain connections do not disappear with a 3-way faucet
The drinking-water outlet and the RO drain perform different jobs. The faucet dispenses treated water. The RO drain carries the system’s reject water to the drainage system.
Using a 3-way faucet does not eliminate that drain line or change the need to install it correctly. Follow the RO manual and applicable plumbing rules for the drain connection. Poor drain routing can contribute to noise, backflow concerns, leaks, or contamination risks.
Air-gap vs. non-air-gap configurations
An air gap provides physical separation between the RO discharge and the drainage system. Plumbing codes based on the Uniform Plumbing Code require qualifying RO drinking-water treatment units to discharge through an appropriate air gap or listed air-gap device. Local requirements and approved installation methods vary, so the authority having jurisdiction makes the final determination.
Some dedicated RO faucets incorporate the drain air gap. These faucets usually have additional tubing connections beyond the single drinking-water line. If you replace one with a non-air-gap 3-way faucet, you cannot simply abandon those drain connections. A separate compliant air-gap device may be needed.
Before changing faucet types, determine:
-
Whether the existing RO faucet contains an air gap
-
Whether the RO system uses another air-gap device
-
What the system manual requires
-
What local plumbing code requires
-
Whether the proposed faucet has any role in the drain assembly

A faucet advertised as “RO compatible” may refer only to drinking-water delivery. It does not necessarily mean the faucet includes a code-compliant RO drain air gap.
Electrical planning
The faucet choice itself generally does not determine whether electrical power is required. That depends on the selected RO system and any associated equipment. Check the exact system manual and confirm that any required outlet is appropriately located before installation.
Final leak, flow, and flushing checks
After installation:
-
Confirm hot and cold hoses are connected correctly.
-
Test the regular faucet controls.
-
Run the filtered control separately.
-
Inspect every fitting while water is flowing and again after the faucet is closed.
-
Check the RO drain connection during system operation.
-
Flush the system for the time or volume specified by its manual.
-
Reinspect the cabinet after the system has remained pressurized.
A dry paper towel placed beneath a connection can help reveal small leaks that are difficult to see.
Real-World Differences in Daily Use
The strongest reasons to choose one faucet arrangement over the other usually appear during everyday use and future maintenance.
Countertop space and appearance
A 3-way faucet produces a cleaner sink deck because one fixture handles washing and drinking water. It is especially appealing in compact kitchens or on sinks with only one usable hole.
A separate faucet adds another visible fixture but creates a clearly defined drinking-water station. It can also be positioned for filling glasses, kettles, or bottles without occupying the main faucet.
RO flow through one faucet or two
RO water will generally flow more slowly than regular tap water regardless of the faucet arrangement. The system’s production method, storage pressure, filter condition, tubing, fittings, and faucet restriction all influence the result.
In a properly designed 3-way faucet, only the filtered channel operates at RO flow. The normal hot and cold sides do not become “RO-slow” because they remain connected directly to the household supply through the mixer.
A separate drinking-water faucet may feel more purpose-built because its entire internal path serves the RO line. That does not guarantee higher flow, however. Its inlet, valve, aerator, and spout can still restrict delivery.
Filling bottles and cookware
A 3-way faucet lets you switch from washing to drinking water without moving to another spout. A high-arc design may also make it easier to fill larger containers, although actual clearance and reach depend on the faucet.
A separate RO faucet creates an obvious physical distinction between water used for washing and water used for drinking or cooking. This can reduce accidental use of RO water for routine sink tasks, but its smaller spout may be less convenient for large cookware.
Cross-mixing and backflow
A properly designed three-way faucet uses separate internal pathways, so the RO water should not mix with hot or cold tap water inside the fixture. Confirm that separation in the specifications and installation diagram.
Do not confuse isolated delivery channels with drain backflow protection. The faucet’s internal drinking-water pathway addresses separation on the dispensing side. The air gap addresses the RO wastewater connection to the drain. Both must be handled correctly.
Replacement, repairs, and future upgrades
With a separate drinking water faucet, the two fixtures remain independent. You can replace the kitchen faucet without changing the RO spout, or replace the RO faucet without disturbing the main mixer.
A 3-way faucet consolidates the installation, but it also consolidates service. A problem with the main fixture or filtered valve may require work on the combined faucet. Future RO upgrades may also require a new adapter if the outlet connection changes.
Cleaning is simpler visually with one fixture and one faucet base. With two faucets, there is another base to clean around, but each fixture has a narrower role and can be serviced separately.
Is a 3-Way Faucet Better Than Drilling Another Faucet Hole?
A 3-way faucet is often the better alternative to drilling when the existing main faucet hole can accept it and the model is compatible with the RO system. It is not automatically the better plumbing solution in every kitchen.
Choose a 3-way faucet when:
-
The sink or countertop has only one usable hole.
-
You want a minimalist sink deck.
-
Drilling the surface is difficult or undesirable.
-
You are already planning to replace the main kitchen faucet.
-
You want hot, cold, and RO water at one fixture.
-
You can verify the filtered inlet and RO connection.
-
The air-gap requirement can be satisfied separately if needed.
Stone countertops are a common reason to avoid creating another opening. A 3-way faucet can use the existing main-faucet location, provided the hole diameter, deck thickness, and under-counter clearance match.
This option may also suit rentals where a property owner permits faucet replacement but prohibits permanent countertop modifications. Obtain permission before changing any fixture, and store the original faucet if reinstatement is required.
Choose a separate RO faucet when:
-
You want to keep the existing kitchen faucet.
-
The sink already has a suitable accessory hole.
-
You want the RO fixture to be repaired independently.
-
You prefer a dedicated drinking-water station.
-
The installation requires a specific air-gap RO faucet.
-
You are adding RO water to a prep sink or secondary counter.
-
A compatible 3-way faucet would require extensive adaptation.
A separate faucet can also be more practical when the existing kitchen faucet is relatively new or has features that are difficult to duplicate in a 3-in-1 model.
Go/no-go constraints
Use these conditions to make the decision before purchasing:
A 3-way faucet is a “no-go” if:
-
There is no verified isolated RO pathway.
-
The mounting dimensions do not fit the existing hole.
-
The filtered inlet cannot be safely adapted to the RO outlet.
-
The faucet is not suited to the RO system’s delivery characteristics.
-
The required air-gap arrangement cannot be retained or replaced compliantly.
A separate faucet is a “no-go” if:
-
There is no accessory hole and drilling is prohibited.
-
The countertop or sink cannot be safely modified.
-
Mounting hardware will not fit below the proposed location.
-
The faucet cannot be positioned to discharge properly over the sink.
Common Connection and Performance Problems
Many post-installation problems are caused by fittings, tubing, flushing, or RO system conditions rather than the choice between one faucet and two.
The RO tube and faucet inlet are different sizes
This is one of the most common compatibility issues with a 3-way faucet. Do not force the tube into an undersized connector or improvise with incompatible threads.
Instead:
-
Confirm the tube’s outside diameter.
-
Identify the faucet inlet size and connection type.
-
Use the specified potable-water adapter or reducer.
-
Cut tubing squarely with an appropriate cutter.
-
Insert push-fit tubing fully to the required depth.
-
Test the connection under pressure.
Thread sealant is not appropriate for every fitting. Compression and push-fit connectors commonly seal through internal components rather than the threads, so follow the fitting instructions.
Filtered water flows more slowly than expected
First determine whether the low flow began immediately after installation or developed over time.
Possible causes include:
-
A partially closed valve
-
Kinked or pinched tubing
-
Tubing not fully inserted
-
An unnecessarily restrictive adapter
-
Air remaining after installation
-
Filters that require replacement
-
Low storage-tank pressure on a tank-based system
-
Insufficient feed pressure
-
A restrictive faucet valve or aerator
-
Excessive tubing length or too many directional changes
Compare flow at the RO outlet only if the system manual provides a safe diagnostic procedure. Do not alter pressure settings or disconnect pressurized components without following manufacturer instructions.
Air or cloudiness appears after installation
New filters and tubing can contain trapped air. This may make dispensed water look cloudy before the bubbles clear. Follow the system’s specified flushing procedure. If the condition persists, is accompanied by unusual odor or taste, or appears after the system has been in use, stop and consult the manual or qualified service provider.
The filtered side drips or will not shut off
A dripping filtered outlet may point to:
-
Debris in the faucet valve
-
A damaged cartridge or seal
-
Incorrect assembly
-
Excessive or unsuitable pressure
-
A problem within the RO system rather than the faucet
Confirm whether the drip continues indefinitely or stops shortly after use. A small amount of residual water may leave the spout after shutoff, but persistent dripping warrants inspection.
Tubing kinks or connections leak
Re-route kinked tubing with a wider bend rather than trying to straighten a severely damaged section in place. Replace tubing that is cut, crushed, or deeply scored.
For a leaking push-fit connection, shut off the water, depressurize the system according to its instructions, remove the tube, and inspect the cut. A slanted or damaged end may not seal properly.
Drain noise or backflow concerns
Gurgling or unusual drain noise may indicate poor drain routing, a restricted drain connection, or an air-gap issue. Water appearing at an air-gap opening can signal a blocked or improperly routed drain tube.
Because the drain side protects against wastewater backflow, do not bypass an air gap to silence a noise problem. Recheck the RO installation instructions and local code requirements. Call a licensed plumber when the drainage arrangement is unclear or cannot be corrected within the approved installation method.
How to Choose the Right Faucet Configuration for Your RO System
Start with the kitchen’s physical constraints, then verify the plumbing details. Choosing based on appearance alone can lead to adapter problems, weak delivery, or an installation that cannot satisfy air-gap requirements.
Pre-purchase compatibility checklist
Before buying a 3-way faucet or separate RO faucet, record the following:
-
Existing number of sink or countertop holes
-
Diameter of the intended mounting hole
-
Countertop or sink thickness
-
Available clearance below the faucet
-
Main faucet hot and cold connection specifications
-
RO outlet tube size
-
Filtered-faucet inlet size and fitting type
-
Included adapters
-
Faucet pressure and flow requirements
-
Whether the RO installation requires an air-gap faucet or separate device
-
Available cabinet space for the RO unit and tubing
-
Access needed for filter changes and repairs
-
Any model-specific electrical requirements
-
Local plumbing requirements

Choosing a reverse osmosis system for either layout
The faucet is only the final delivery point. When comparing RO systems, review model-specific installation requirements, outlet connection, available pressure and flow information, drain configuration, cabinet footprint, and maintenance access.
Explore RO Options for Your Faucet Setup
Once you know whether you prefer a 3-way kitchen faucet or a separate drinking-water faucet, compare the RO system itself and plan ahead for future filter replacement.
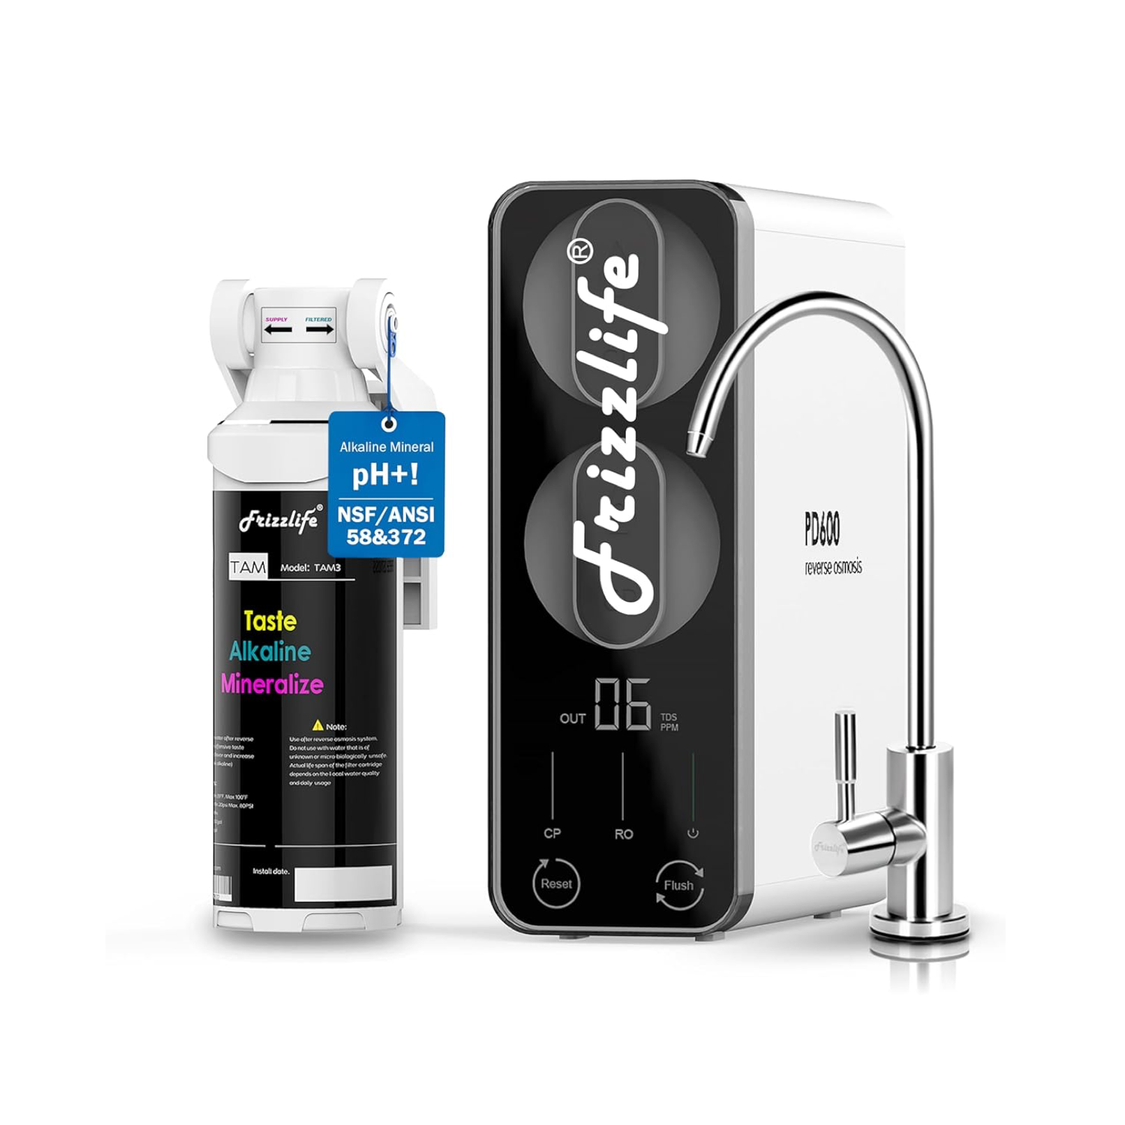
Frizzlife PD600-TAM3
Explore the PD600-TAM3 when planning an under-sink reverse osmosis setup and review its connection and installation specifications before selecting a faucet.
View PD600-TAM3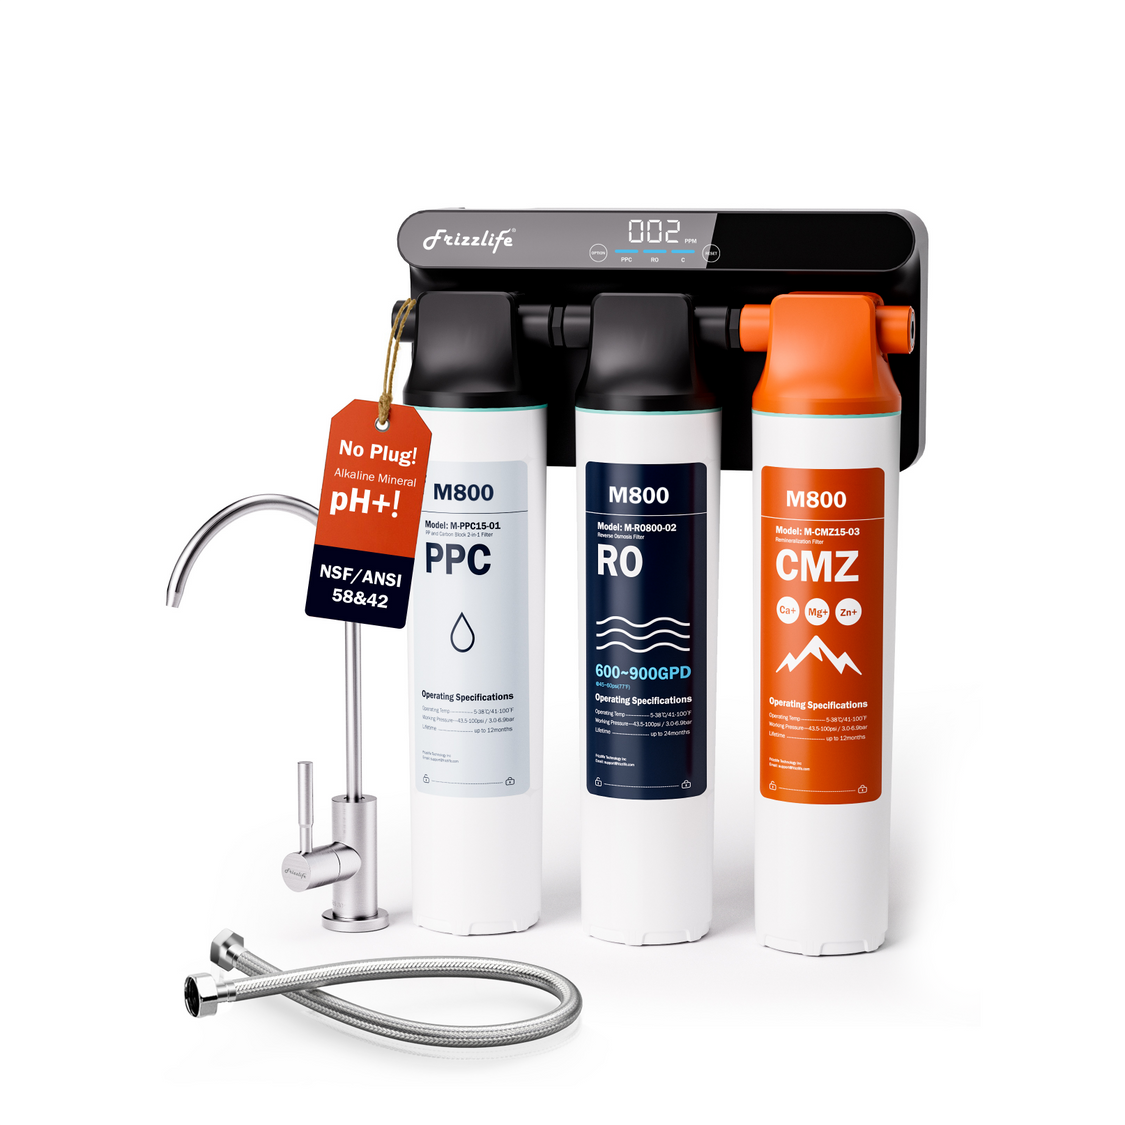
Frizzlife M800
Compare the M800 as another RO system option and check its outlet connection, installation requirements, and faucet compatibility for your kitchen layout.
View M800
Replacement Filters
Already have a Frizzlife system? Use the replacement filter page to find the appropriate cartridge or filter set for your specific model.
Find Replacement FiltersBefore choosing a faucet, verify the RO system outlet tubing, faucet inlet size, fitting type, and any applicable air-gap requirements for the exact installation.
Do not assume that every system includes the same tubing, adapters, faucet, or air-gap arrangement. If you plan to substitute a 3-way faucet for the supplied drinking-water faucet, confirm that the change is permitted by the system documentation and will not interfere with installation requirements or warranty terms.
Do you need a separate faucet for reverse osmosis?
No—not in every installation. A compatible 3-way faucet can dispense RO water without a second visible spout.
You still need a separate RO faucet when the main faucet cannot provide an isolated filtered-water pathway, when you want to keep the existing mixer, or when the required air-gap configuration is best handled through a dedicated drinking-water faucet.
Final Decision: 3-Way Kitchen Faucet or Separate RO Faucet?
A 3-way kitchen faucet is usually the strongest fit for a one-hole sink, a minimalist layout, or a countertop you do not want to drill. It can deliver hot, cold, and RO water conveniently, but only when it has a genuine third inlet, an isolated drinking-water channel, compatible fittings, and an acceptable air-gap plan.
A separate RO faucet is usually the more flexible option when you want to preserve the main kitchen fixture, use an existing accessory hole, maintain independent serviceability, or install a dedicated air-gap faucet.
Measure first, verify the connection diagram, and treat the faucet, RO outlet, and wastewater drain as three related but distinct parts of the installation. That approach is more reliable than choosing either configuration based on appearance or a broad compatibility claim alone.